When choosing a floor covering in a private house, the climatic conditions of the region, layout features and the purpose of the premises are taken into account. Types of floors: concrete, dry screed, wooden. Unlike an apartment, a cottage does not require a permit for the installation of a warm water base. For its installation, calculations should be made, pipes should be laid and connected to the heating system. The heated substrate makes it possible to save on heating costs.
What is the best coverage?
One of the stages of building a house is flooring. When choosing its design, they take into account the operating conditions, materials, financial capabilities of the owner, and the interior. You can make floors in a private house:
- wooden;
- concrete;
- with a dry screed base;
- warm.
Wooden bases are popular due to the environmental friendliness and availability of the material. They keep warm well, are pleasant to the touch. Easy to clean, repaired, have a beautiful appearance, do not require finishing. They are often arranged on the ground floor as the coldest.
The single plank floor has a simple structure: the timber is attached directly to the joists. The main disadvantage of such a coating is its limited use, it is laid in summer cottages, in summer houses with seasonal living, non-residential premises. For a house in which it is planned to live year-round, they arrange a double wooden floor, consisting of a base, a rough and a finishing coating. The disadvantage of a tree is susceptibility to decay, fungi and pests. To protect against them, the material is treated with special means.
Concrete flooring is popular for its low cost. You can do it yourself if you know the basics and have construction experience. One of their disadvantages is that it takes a lot of time to dry the screed. The concrete is cold, so the base should be insulated. At the final stage, the installation of the floor covering is required. Depending on the purpose of the room, it can be tiles, laminate, linoleum, carpet.
A dry screed is mounted faster, makes it possible to create additional thermal insulation, put any floor covering on top.
Underfloor heating is popular due to its efficiency and high efficiency. They save on heating costs. They can be used as the main heating source or combined with radiators. The cheapest to operate is a base with a water heat carrier, heated with a gas boiler. The version with electric heating is thinner than with water heating, it is easier to install, quickly turns on and off, and is more conveniently regulated.
Wood flooring
In order for the floor in a private house to serve for many years, it is necessary to select high-quality wood. The flooring is subjected to significant mechanical stress, so timber is chosen with high technological characteristics. It must be well dried, with a moisture content of no more than 12%. Deformations, cracks and chips on the surface are unacceptable. Experts recommend using conifers: cedar, pine, fir, larch.
To protect against fungus and pests, the tree is covered with an antiseptic, to increase fire safety, it is treated with a fire retardant.
The floor device includes logs, subfloor, rough and finish coating, heat and waterproofing. The underfloor acts as an air gap that prevents moisture accumulation. Without it, the tree will quickly fall into disrepair.

Installation consists of the following stages:
- 1. First, install the support pillars. They can be brick, foam blocks, etc.
- 2. Then the fertile soil layer is removed, gravel is poured, a cushion of sand is placed on top. Each layer is carefully compacted.
- 3. At the next stage, waterproofing is laid, fixed at the ends of the support pillars (roofing material is used).
- 4. Further, with the help of metal corners, the lags from the edged bar are fixed.
- 5. The space between the beams is filled with a heat insulator. Experts recommend using mineral wool.
- 6. After the insulation is laid, a rough covering is mounted on the support bar. The boards are placed tightly to each other so that there are no gaps. They are attached to the lags with self-tapping screws.
- 7. Along the perimeter between the walls and the flooring, leave an air gap of 1.5 cm for ventilation, as well as to protect the walls from expansion of the floorboards when they dry.
- 8. A vapor barrier made of polyethylene film is laid on the sub-surface. The joints of the strips are additionally secured with tape. The edges are wrapped around the walls (about 20 cm).
- 9. When the vapor barrier layer is fixed, a finishing coating of boards, parquet, cork is mounted.
The wooden floor can have a concrete base. So that there are no differences in height, it is done using a self-leveling mixture. Then they lay a waterproofing layer, mark the floor under the logs, mount the studs for their fastening. Beams are laid with a step of at least 60 cm, having previously drilled holes in them for fastening material. The free space is filled with insulation. A finishing floor or plywood is placed on top, on which a decorative coating is laid.
How to make a concrete screed correctly?
The device of the concrete floor is carried out in stages. The base is being prepared: garbage, plants are removed, the top layer of soil is removed. Then the markup is done. It is more convenient to use a laser level for this. It is installed at the bottom of the doorway and marks are drawn on the walls that define the line of the future floor. To measure the level in the center of the room, nails are hammered into the walls, according to the markings and twine is pulled.
Next, gravel filling is done. The pegs are installed so that they are 10 cm below the future level of the cement screed. They begin to pour gravel from the wall opposite the door. When the area is completely covered to the height of the pegs, the pegs are removed. A sand cushion is placed on top of the gravel. Both layers are well compacted.
At the next stage, waterproofing is made of polyethylene with a thickness of at least 250 microns. It is necessary to protect against moisture. The film is laid so that its edges go to the walls by 10-15 cm, above the cement screed. All seams of polyethylene strips are connected with construction tape, proceed to filling.
Using the level, beacons are set from wooden slats in increments of 1-1.5 m. The top edge of the rail should touch the taut twine. After installing the beacons, the ropes are removed. For a concrete screed, only fresh mortar is taken, which is prepared from cement of a grade not lower than M300, sand and water. To make the concrete stronger, plasticizers are added. If its thickness exceeds 5 cm, reinforcement is performed.
Before pouring, a special mesh or reinforcement is laid on the waterproofing layer. Concreting is started from the far wall, pouring in the space between the first two battens. Then, using the rule, the solution is leveled, the excess is removed. When the concrete has set a little, the slats are removed. The resulting voids are filled with mortar and leveled with a plaster float.
After filling the cracks, the concrete is covered with plastic wrap and left to dry for 3-4 weeks. Experts recommend removing the polyethylene and moisturizing the coating during drying at intervals of several days. This procedure will allow it not to crack and gain maximum strength.
Laminate, linoleum, ceramic tiles, cork are laid on the concrete screed.
Secrets of underfloor heating
Warm water floor is gaining more and more popularity. It can serve as the basis for heating or maintain a comfortable living environment. It depends on the general heat loss, the climate in the area, and the design features of a private house. They are not suitable for wood flooring, as wood does not conduct heat well. The best option is a cement screed. A water-heated concrete floor is used for the first, basement floors, if the base is a sand cushion.
Do-it-yourself installation of underfloor heating begins with the preparation of the base, it should be even without indentations and protrusions. The permissible difference is 5 mm. If the defects in height or depth exceed 1-2 cm, a leveling layer of fine gravel with a grain size of no more than 5 mm is poured.
Underfloor heating is carried out using two methods: a snail and a spiral. With the 1st option, the entire surface is evenly warmed up. The coil provides better heating in colder areas. Therefore, the first hot branches are mounted in this zone. According to the drawing of the laying scheme, the required pipe length is calculated.

For underfloor heating, only a one-piece pipe is used. If the area of the room is large, several heating circuits are mounted, each of which should not exceed 100 m, so that there is enough pressure for the circulation of the coolant.
It is better to use metal-plastic pipes with a diameter of 16 mm. For thermal insulation, an insulation with a thickness of at least 5 cm is laid on the base.If the base is soil, or there is a cold room below, the insulation layer is made 10 cm.To reduce heat loss, a metallized film is laid over the heat insulator, which serves as a reflective screen. It also requires protection, so polyethylene (75-100 microns) is laid on top. The strips of the film are overlapped, fastening the seams with construction tape.
The pipes are fixed with fasteners: metal mesh, strips, plastic brackets. The filling is carried out after the installation has been completed, the connection to the manifolds has been made, and the system is filled with a coolant at a pressure of 4 bar. A damper tape is laid along the perimeter to compensate for expansion, to insulate the floor from the walls, to eliminate cold bridges through which heat is lost.
Before concreting, a reinforcing mesh is mounted on top of the pipes, if strips and brackets were used as fasteners. A concrete screed is made from 5 to 10 cm, there should be at least 3 cm of mortar above the pipe. With insufficient thickness, surface cracking is possible, with an excess, heat loss is inevitable. While the concrete is setting, it is covered with plastic wrap to maintain normal humidity. The screed hardens completely for 28 days.
Dry screed - an alternative to cement coating
A floor based on a dry screed is installed faster than wood or concrete. It is important to select high-quality bulk material: slags, silica, perlite or quartz sand, fine-grained expanded clay.
If the mixture is properly distributed over the area, it almost does not shrink, it is a good heat and sound insulator. Such bases, with good performance, will last a long time.
Phased installation begins with a waterproofing device made of polyethylene film. The material is laid with an overlap of 10-15 cm on the walls. Then beacons are installed, which will serve as a guide for alignment. The dry mixture is poured onto the substrate and distributed evenly over the surface using a rule. So that the mass does not crumble, wooden partitions are installed at a distance of 60-80 cm.
On top of the dry screed, sheet materials are laid: plywood, boards of moisture-resistant GWP, etc. In order for the surface to be flat, it is important to correctly lay the first sheet using a level, and then the rest, focusing on it. Installation begins from the door, moving along the wall, so as not to disturb the evenness of the fill. At the same time, the plates are not pressed into the poured mixture, they are carefully moved along the surface. The horizontality is checked by the building level. The areas to be covered are well compacted in front of the flooring, especially in places of significant stress.
Gypsum-fiber boards are connected using folds located on them. Finished sheets are laid on the mixture, shifting each next half, as when laying a brick, to increase stability. To make the flooring more durable, a second is arranged on top of the first layer, and its sheets should lie perpendicular to the lower ones. The upper and lower layers are held together with glue and self-tapping screws. The fasteners are screwed in under load, the role of which is played by the weight of the master who stands on the top sheet. On doorways, the material does not join, the canvas should be in both rooms.
After installation, the joints and the heads of the self-tapping screws are putty to level the surface. Before finishing, a waterproofing material, for example, a sealant, is applied along the perimeter of the room in the places where the coating adheres to the walls. In the bathroom, before decorative finishing, the slabs are covered with a coating waterproofing.
Floor finishing is one of the last stages of renovation in an apartment or private house. It can be carried out using a variety of materials, each with advantages and disadvantages.
Depending on the purpose of the room, there are certain material requirements:
- Hallway. An area with high foot traffic where a large amount of dust and dirt accumulates. The flooring should be as strong and non-marking as possible.
- Bathroom. In this room, the flooring is constantly in contact with water, so the material must be moisture resistant and easy to clean.
- Kitchen. It also needs a material that is not exposed to moisture and does not absorb grease.
- Balcony. The conditions in such a room are close to outdoor ones, so the products must be resistant to low temperatures and humidity.
- Living room. This is a room with a high foot traffic, therefore the main characteristic of the material is mechanical strength.
- Bedroom. In this case, the floor covering must be environmentally friendly.
- Children's. The material should combine the characteristics of the products for the two previous rooms.
This material is used for laying floor coverings in rooms of any purpose. Linoleum was especially popular during the Soviet Union; now it is not so widespread, but it still holds certain positions.
 Linoleum - affordability and ease of care
 Advantages:
- Wide range of. The material for the floor is made in various colors and can have patterns and ornaments on the front. Modern roll materials imitate the surface of stone, wood, parquet and so on.
- Moisture resistance.
- Mechanical strength.
- High performance of sound and heat insulation.
- Easy installation and maintenance.
Of the shortcomings, it should be noted that the plasticity is too high; dents remain on the linoleum after furniture and other heavy objects. Some models emit harmful substances, this can be determined by a strong chemical odor.
Another classic floor finish. Most often, the material is used for arranging flooring in kitchens and bathrooms.
 Ceramic tiles - environmental friendliness and durability
 The positive aspects of tiles include:
- Resistant to chemicals, water, UV and abrasion.
- A wide range of shades and sizes of products. Also, materials are produced that imitate the color and texture of natural wood, stone and others.
- Easy to care for.
- Health safety.
Tile is considered almost ideal for floors in the house, but the material is cold, which makes it unpleasant to walk on it barefoot. Some species become slippery when wet, and the tiles are quite fragile and easily shatter when struck or dropped by an object.
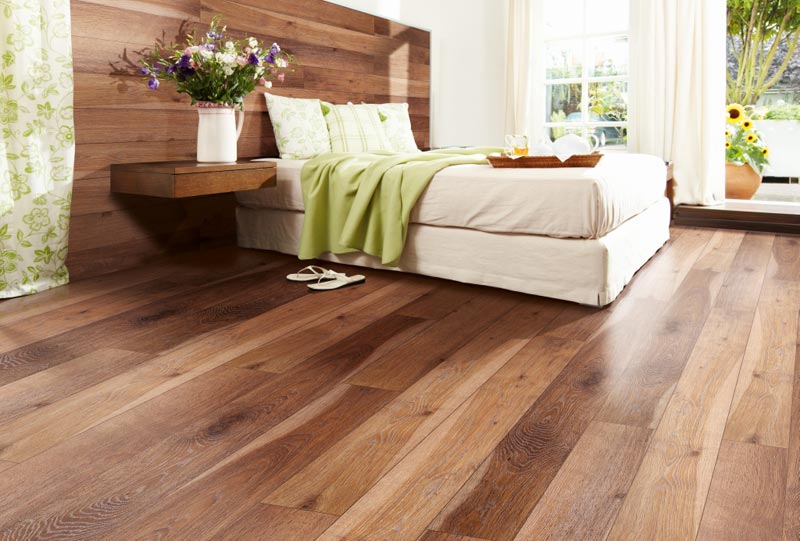
Wood is now experiencing a new wave of popularity. With its help, floors are laid in rooms for any purpose, including kitchens.
 Plank floor - nobility and a sense of comfort
 Advantages:
- Noble appearance.
- Environmental friendliness.
- Feeling of comfort and coziness.
- The possibility of using in almost any interior and combining with other materials.
Among the disadvantages, exposure to water should be noted, so it is necessary to take measures to protect the coatings. Because of this, finishing the floors requires more time and money. The ability to absorb moisture makes the wood very brand, spilled juice, tea or coffee will leave a mark on the surface.
Also, the wood requires regular scraping, since over time, burrs appear on the surface. In addition, high-quality natural materials are quite expensive. If not processed correctly, they can swell or dry out, leading to deformation. Do not forget about rodents and insects that prefer to settle in such an environment.
 Cork floor - natural and warm
 Such flooring materials allow you to create a truly original flooring. The products are made from the bark of the balsa tree, so they are completely natural and environmentally friendly.
- Barefoot comfort.
- The coating is non-slip and non-marking.
- The cork is well protected from moisture.
- The material is easy to clean.
- A wide range of colors and textures.
Among the disadvantages are low mechanical strength and short service life. In addition, the cork needs subsequent varnishing, so such floors cannot be called budget-friendly.
 Laminate - a wealth of choice and ease of maintenance
 These products were invented to replace natural wood. Some of its characteristics are significantly higher than those of wood:
- Laminate is produced in a very rich assortment. It can imitate shades of almost all types of wood, natural stone, fabric, leather and so on.
- The material is warm, in addition, under it you can lay the "warm floor" system.
- Ease of maintenance.
- Moisture resistance.
- Relatively low cost.
- Ease of installation (products are equipped with locking systems, thanks to which they are easy to lay).
Despite the fact that there are models with a waterproof coating, it is better not to use laminate for the kitchen or bathroom. You will also need to lay a layer of waterproofing. It should be noted that the laminate is quite fragile: prolonged contact with water and mechanical stress leave traces on it. In addition, during installation there is a risk of damage to the locking joints, so products must be purchased with a margin.
 Porcelain stoneware - strength and practicality
 This material is very similar to ceramic tiles, but it is produced using a slightly different technology. At the same time, it resembles a natural stone. In the modern world, porcelain stoneware products are popular due to the following advantages:
- The strength of porcelain stoneware is estimated at 9 points out of 10.
- Surfaces can last up to 50 years.
- Does not emit harmful substances when heated and wet.
- Ease of care.
- Resistant to sunlight and water.
- Does not burn or sustain combustion.
- Wide range of.
The main disadvantage is the high cost, and this applies to the prices of both materials and installation work. Polished porcelain stoneware is too slippery for use in kitchens and bathrooms. In addition, it is cold and therefore needs to be heated. In some cases, it is impossible to cover the floor with such material due to the large weight.
Self-leveling floors
 Self-leveling floor - aesthetics and uniqueness
 This type is considered relatively new, it has not yet gained popularity among users, but it has a number of undeniable advantages:
- The presence of polymer compounds in the composition provides high moisture resistance, so it is easy to wash.
- Self-leveling floors can last about 20 years.
- No seams are formed on the surface, which makes it look aesthetically pleasing. The same feature protects the coating from the appearance of fungus.
- Attractive appearance.
Among the shortcomings, it should be noted the high cost of the material and the need for serious preparatory processes. In addition, the coating cannot be repaired locally. That is, if in some place the floor crumbles, you will have to completely remove the coating and fill in a new one.
Concrete
Previously, concrete was used only for arranging floor coverings in utility rooms, garages, and so on. Now the concrete screed is very often the basis for other products: parquet, laminate, tiles and others. But modern methods of pouring and grinding make it possible to create a perfectly smooth, visually attractive (as you can see in the photo) and completely inert coating to water. In addition, the floors are strong and durable.
 Concrete floor - strength and durability
 Among the disadvantages, a large weight of the material can be distinguished, so it cannot be used in wooden houses. It also requires specialized construction equipment and skilled operators to maintain a perfectly level surface. Another drawback is the complexity of the work.
On a note! If the floor is finished with concrete, then it is subject to mechanical stress. Despite its strength, the material may crumble when dropped from a height.
Once this material was the main product for construction, but now it is considered a sign of wealth and luxury. The fact is that the stone itself is cheap, but its processing requires high-tech, and therefore very expensive, equipment and consumables.
 Natural stone - presentability and practicality
 Of the advantages, it should be noted:
- High mechanical strength.
- Resistance to almost any impact (precipitation, sun, impact).
- Almost unlimited service life.
But natural stone also has disadvantages:
- Significant weight, which makes it difficult to work with, it is not suitable for all floors.
- The stone is cold, so you will have to install a "warm floor" system.
- The installation process is quite expensive.
- The material requires special care.
Another material for the arrangement of floors, which has been known to mankind since antiquity. It is also considered to be expensive as it is rather difficult to install. It is made from glass or natural stone.
 Mosaic - elegance and originality
 The main advantage of the mosaic is that it turns out to finish even curved surfaces, while you can create any patterns and designs using multi-colored elements. For ease of installation, manufacturers pre-attach the mosaic fragments to the mesh, forming a pattern. The master only has to glue it to the floor. In terms of its performance, the mosaic resembles a tile.
Among the shortcomings, it should be noted the high price for the material itself and for the work on its installation. In addition, mosaic tiles are not suitable for modern interiors; they look better in a classic or antique style. It should also be noted that only an artist or a person with developed taste and imagination can independently cope with the installation of the mosaic.
Polyvinyl chloride
Products from this material are produced in the form of tiles with an adhesive base or a lock connection. There are also cheaper varieties that need to be laid on a layer of tile adhesive. Modern PVC coatings are produced in a wide range of colors. Previously, tiles from this material were also used for laying flooring, many people remember these blue and green squares, now the products look more aesthetically pleasing.
 Polyvinyl chloride tiles - a wealth of choice and resistance to moisture
 Of the advantages, it should be noted:
- Easy and fast styling.
- Ease of maintenance.
- High soundproofing characteristics.
- A wide range of colors, shapes and sizes.
- Long service life.
Despite the listed advantages, there are also disadvantages:
- High requirements for the preparation of the base. The rough coating must be perfectly even, otherwise all defects will eventually be reflected on the tile. It is also important to take into account that the moisture content of the base cannot be higher than 5%.
- Before covering the floor with such material, it is necessary to keep the tiles indoors for several days so that they adapt to the conditions. In addition, each manufacturer indicates the temperature and humidity conditions that must be observed during installation.
- Changes color and breaks down when exposed to sunlight.
- PVC is a synthetic material and therefore emits harmful substances when it burns. As for fire safety, it also leaves much to be desired.
This is a fairly popular option for finishing floor surfaces. It is a soft and warm material with long or short nap, which is laid on a prepared base and covered with a skirting board. The result is a covering that resembles an ordinary carpet, but which is covered over the entire area of the room.
 Carpet - comfort and soundproofing
 Advantages:
- Relatively low cost.
- Comfort and coziness.
- A wide range of design solutions.
- Long service life and resistance to various kinds of influences.
- High level of sound insulation.
Of the negative qualities are:
- Cheap product options are not protected from the negative effects of ultraviolet radiation.
- High hygroscopicity and exposure to water.
- Build up debris and dust.
- Difficulty in leaving.
- Light-colored products are very easily soiled.
- Requirements for the preparation of the base. There must be a layer of reliable waterproofing under the carpet.
Last but not least on the list is the flooring option. It is a high quality and at the same time elite coating. Performance is directly related to the type of wood used in the manufacture, as well as the production and processing methods.
 Parquet - durability and warmth
 If we talk about the positive aspects of parquet, it should be noted:
- Attractive appearance. Like other natural wood products, parquet boards look noble.
- Long service life. With proper application and regular sanding, the coating can last about 30-40 years.
- High thermal insulation qualities. In warm regions, it is not necessary to lay insulation under the parquet floor.
Minuses:
- Susceptibility to various deformations. In the summer season, the wood expands, in winter it shrinks, therefore, expansion joints must be left when laying.
- High price. Parquet significantly surpasses laminate or linoleum in this indicator.
- The need for regular repair and replacement of the protective varnish layer.
 Parquet is one of the best types of flooring, but due to the high cost of material and work, it has not gained much popularity.
 A huge number of different materials are suitable for finishing floor coverings. Craftsmen even use coins or cardboard to decorate the floors. Most of the products can be stacked by yourself to save a little money on hiring specialists. But there are also those that require qualifications and the use of a professional tool.
The wooden floor on the logs allows you to get by with the construction of a house on the ground floor without the use of a reinforced concrete floor or other concrete foundation, the construction cost of which is quite high.
Effective ventilation of wood on joists in a private house - a necessary and prerequisite for the reliability and durability of the structure.
Wooden floor on pillars along the logs
The figure shows a variant of the construction of a wooden floor on logs in a private house with an underground space.
The space under the floor is formed due to the fact that the logs are laid on rather high posts made of bricks or concrete blocks. This design allows you to raise the floor level of the first floor with a minimum amount of soil filling the basement space.
Here, the basement and basement space under the floor are outside, outside the thermal insulation of the house, and will be cold.
For ventilation of the underground space in the opposite outer walls, above ground level, air vents are made - through holes covered with a metal mesh to protect against rodents. The same holes should be in the internal load-bearing walls.
The movement of air under the floor is mainly due to wind pressure.
In winter, there is a danger of freezing of the soil in the underground space, which can lead to the movement of the floor relative to the walls on heaving soils.
To prevent freezing of air vents for the winter, it is recommended to close, and insulate the base.
However, the deterioration of ventilation as a result of the closure of the vents leads to the accumulation of moisture in the insulation and wooden parts - to a decrease in the thermal resistance and durability of these elements.
I must say that such a device for underground space has been used in private construction for a long time. The structure was not originally designed for effective floor insulation.
In houses with poor thermal insulation of the floor in winter, part of the heat from the room penetrated into the underground space and heated it, preventing freezing, but increasing heat loss.
Modern thermal insulation of the floor practically blocks the heat flow into the subfloor from the premises.To prevent freezing of the subfloor is possible only by saving the heat of the earth.
With modern requirements for energy saving, a cold underground ventilated through air vents is not the best option. It is still used more by inertia.
 Scheme of effective ventilation of the subfloor in the basement of a private house through an exhaust duct
 To ventilate the subfloor of a private house, cottage, it is beneficial to use effective ventilation through an exhaust duct. This ventilation scheme is the only correct option for a house with an insulated basement or basement.
How to make a wooden floor on poles
In old books and regulatory documents on construction, you can find floor structures on pillars using non-effective thermal and waterproofing materials.
Modern floors on logs in a private house do this
Support posts are laid out of ceramic bricks or concrete blocks. The distance between adjacent posts along the log (span) is recommended to be taken no more than 2 m... The base of the column can be a layer of compacted crushed stone with a thickness of 50-100 mm spilled with bituminous mastic. Or, instead of mastic, a waterproofing film is used.
The top of the columns is leveled at one level with a solution. With a mortar thickness of more than 3 cm. the masonry mesh is recessed into the solution. The top of the posts is covered with a sheet of waterproofing material.
Wooden beams are laid on the waterproofing layer. The distance between adjacent lag beams (lag step) is determined by their section, as well as the bearing capacity and stiffness of the overlying floor layers - lathing, sub-floor, topcoat. Usually they take a step that is convenient for laying between the logs of standard slabs of mineral wool insulation, about 600 mm.
For the above step of the lag and the span between the posts, taking into account the thickness of the insulation and the crate, with the usual loads on the floor, the section of the lag is sufficient 100-150x50 mm. At the bottom of the lag, lying on the posts, a galvanized steel mesh is attached. Instead of a grid, boards can be nailed into the run, slats with a thickness of at least 20 mm.
A windproof, highly vapor-permeable film is laid on top of the mesh (boards) and the lag.
Such a film prevents makes it difficult for the insulation particles to be carried away by the air stream (dust formation), but does not prevent moisture from evaporating from the insulation and wooden parts.
A sheet of windproof vapor-permeable film is laid on top, across the log, and lowered on both sides of each log until it stops against the steel mesh so that a tray is formed between the logs. The film is nailed with a stapler to each side of all lags.
Mineral wool insulation is laid on the windproof film in the formed channel between the logs. You can do without a windproof film if you use special insulation boards with a compacted windproof layer for the bottom layer.
How to determine the thickness of the floor insulation
The thickness of the floor insulation is chosen by calculation, providing a standard resistance to heat transfer R = 4-5 m 2 about K / W... If the basement is not insulated, then the thickness of the floor insulation is determined from the condition that the temperature of the space under the floor is equal to the outside air temperature. The recommended thickness of mineral wool insulation in this case is not less than 150-200 mm.
For a house with an insulated foundation and a plinth, the thickness of the floor insulation can be reduced so that the sum of the heat transfer resistances of the plinth + floor is no less than the standard (see above).
How to calculate the thickness of the floor (floor) insulation
A crate of bars with a thickness of at least 50 mm is laid across the lag. Another layer of insulation is placed between the lathing bars. Such a two-layer construction of insulation ensures that the insulation overlaps the cold bridges through the logs. The distance between the lathing bars is chosen in the range of 300-600 mm., a multiple of the width of the slabs of the subfloor.
Such a two-layer construction of the base of the floor (logs + lathing bars) allows you to conveniently place both insulation plates and floor slabs (DSP, plywood, etc.).
Insulation with a crate on top is covered with a vapor barrier film. The joints of the film panels are sealed. The adjoining of the film to the walls is connected to the waterproofing of the wall and the same is sealed.
It is recommended to choose the thickness of the lathing bars at 25-30 mm. more than the thickness of the top layer of insulation. This will allow, due to the lowering of the film on both sides of each batten of the crate, to create a ventilated gap between the vapor barrier film and the floor covering.
Steam thermal insulation with penofol
Instead of a top layer of insulation and a vapor barrier film, it is more profitable to lay penofol - a foamed polymer covered with aluminum foil, 10 mm. (also available under other trade names).
Penofol must be laid with the aluminized side up, towards the ventilated gap, across the sheathing bars and lowered on both sides of each bar. After that, a penofol stapler is nailed to each side of all the bars so that a gap of 3-4 forms between the aluminized surface and the flooring slabs cm.... The joints of the penofol panels are sealed with aluminized adhesive tape. A layer of foam foam will provide heat transfer resistance equivalent to a layer of mineral wool with a thickness of 40 mm., and the necessary vapor permeability.
Sub-floor boards are attached to the lathing bars on top of a vapor-proof film or foam foam. Instead of boards, boards are more often used: cement-bonded particle board (thickness> 22 mm.), plywood (> 18 mm.), etc. Sheets, slabs are laid with the long side on the lathing bars. Under the short side, spacers are fixed between the lathing bars. All edges of the laid sheet must be supported under them - a bar or spacer.
The use of polystyrene foam, expanded polystyrene plates as insulation is not recommended. Such boards serve as a barrier to moisture, which is always contained in the wood of the floor. By preventing moisture from escaping from the wood, the foam insulation shortens the life of the wood flooring. In addition, mineral wool insulation, due to its better elasticity, adjoins the logs more tightly than foam.
To protect the underground space from soil moisture, it is advisable to cover the entire surface of the soil with a waterproofing film (and not just under the posts, as in the figure). The joints of the covering panels are sealed. The adjoining of the film to the walls must be connected to the waterproofing of the wall and also sealed. The pillars of the floor lie directly on the foil.
As a result, we get a ventilated underfloor space, limited by sealed shells - from above (vapor barrier) and from below (waterproofing).
Such an underground space protects the house not only from moisture and cold, but also from penetration into living quarters.
Floor on logs on intermediate walls
In modern floor structures, log beams are located at a small distance from each other, which allows the use of lumber of a smaller section, and hence the cost, and it is also convenient to place insulation plates.
Instead of brick columns, the logs can be advantageous to lean on intermediate walls laid across the log with an interval of about 2 m... Bricks or blocks in the wall are laid in the honeycomb method with a thickness of half a brick, leaving increased gaps of 1/4 brick in the vertical joints for ventilation of the underground space. If the wall has a height of more than 0.4 m., then at least every 2 m. the length of the wall, lay out pilasters - bricks thick columns, to increase the stability of the wall.
If the lag step is not more than 600 mm. and span less than 2 m., then the section of a wooden log is enough to have 100x50 mm.
Wooden floor on the ground on logs
Another option for a wooden floor along the logs in a private house is shown in the following figure:


Here, unlike the first option, the floor level is raised to the required height by filling the basement with compacted soil.
Ventilation of the floor is carried out due to the movement of air under the action of the draft of the ventilation duct.
Warm air is taken from the room and through the ventilation holes in the baseboards and the gap between the sub-floor and the wall enters the space between the joists. Then the air enters the ventilation duct.
To ensure ventilation of the underfloor space, skirting boards with holes are used or they provide for the installation of skirting boards with a gap between them and the walls.
So that the air moves more or less evenly under the entire surface of the floor, the gap for the passage of air is made of different widths - the further from the ventilation duct, the wider the gap (2 cm.). Near the ventilation duct, holes are not made in the baseboards and the gaps between the wall and the flooring (or the gap is sealed with tape).
It is important to understand that in this ventilation option, unlike the first, the underground space is inside the heat-protective shell of the house, and must be warm. The outer shell of the subfloor must have a resistance to heat transfer not less than the wall of the house. Otherwise, the flow of warm air from the room may lead to the formation of condensation on the parts of the subfloor.
Make a layer of bulk soil thicker than 600 mm. Not recommended. Pour soil and carefully ram in layers no more than 200 mm... It is still not possible to compact the bulk soil to the state of natural soil. Therefore, the soil will settle over time. A thick layer of fill soil can result in too much and uneven floor settlement.
The waterproofing film is laid on an equalizing layer of sand with a thickness of at least 30 mm... The joints of the film panels are sealed. The adjoining of the film to the walls is necessarily connected to the waterproofing of the wall and is also sealed.
The thermal insulation is placed on top of the waterproofing.
In this option, it is better to use polymer insulation boards - polystyrene (expanded polystyrene). The thickness of the insulation is enough 50-100 mm., since the temperature of the soil under the house is always positive.
If the walls and basement of the house are not insulated, then along the outer walls for a width of at least 800 mm. a thicker layer of insulation should be laid, 150 - 200 mm.
At a house with multilayer outer walls with insulation outside, to exclude a cold bridge bypassing the insulation of the walls and floor, the outside is necessarily insulated(see the figure in the first part of the article).
The floor beams lie on low pads of brick or concrete blocks.
If boards of extruded polystyrene foam (XPS, penoplex, etc.) are used as thermal insulation, then the logs can be laid on linings cut from these boards.
A gap of 3-5 should be provided between the thermal insulation and the wooden floor joists. cm... for free air movement.
According to building regulations, there is one limitation on flooring. Since the space under the floor is ventilated through the exhaust duct of natural ventilation, it is forbidden to make the final floor covering from combustible materials: from boards, parquet boards and shields, etc. Or, under them, a non-combustible base should be provided, for example, a prefabricated screed made of gypsum plasterboard, gypsum fiber sheets or a subfloor made of cement particle boards.
In this version, the logs and other floor elements are in better humidity conditions than in the first case.
In this design, the ventilation duct serves to ventilate not only the subfloor, but also the premises of the house. What needs to be done to save the heat emitted by the ventilation system,
Floors, soils and foundations
Ground floors are not connected to the foundation and rest directly on the ground below the house. If heaving, then the floor in winter and spring can "spree" under the influence of forces. To prevent this from happening, the heaving soil under the house must be made not to heave. The easiest way to do this, and the underground part
The construction of pile foundations on bored (including TISE) and screw piles requires a cold base. Warming the soil under the house with such foundations is a rather problematic and expensive task. Ground floors in a house on a pile foundation can be recommended only for non-heaving or slightly heaving soils on the site.
When building a house on heaving soils, the underground part of the foundation is also required to a depth of 0.5 - 1 m.


 Environmental friendliness and increased thermal insulation characteristics are the main advantages of a wood floor
  All kinds of floor bases are superior to concrete floor
  Due to its attractive appearance, wood floors are preferred
  Wooden floors are fixed on logs
  If necessary, raise the floor surface, use support posts
  Floor on support pillars
  Concrete or cement screed is often used as a floor base
  Pre-installed beacons are used to fill floors in a private house
  A fairly simple technology for the formation of floors using the dry screed method