Android Debug Bridge (adb) is a console program that allows you to debug Android mobile devices as well as emulators.
Description
This utility greatly simplifies the installation and debugging of applications, and also provides access to the Unix shell. The latter can be used to run the required commands on the device. Among other things, the program can be used to unlock a smartphone with debug mode enabled. It should be noted, however, that the Android Debug Bridge supports work with any Android device, provided that the required functionality has not been blocked by the manufacturer.
The program includes three components:
- Customer. Works on the developer's PC, sends commands. To call the client, you can use the appropriate command in the terminal.
- Daemon (adbd). Executes commands on the device. Works in the background on every device.
- Server. Manages the communication between the client and the daemon. Works in the background on the developer's computer.
ADB Features:
- View a list of connected and supported devices.
- Viewing logs.
- Copy and transfer data and files between devices.
- Installing and uninstalling applications.
- Clearing and overwriting the data section.
- And also much more.
From our site you can download Android Debug Bridge for free, without registration and SMS.
Screenshots

Many have heard of adb, many have used adb and know the full power of the console. It's time to simplify and interact with this functionality through the Adb Run program. You can find out in detail in this review.
The essence of the Adb Run program is that many users who use adb use typical commands and actions, and it automates them and makes it easier for the user to access the console.

As you can see, the program has a console form and currently consists of 14 items, the control in the program is as follows: transitions from the menu to the menu using numbers, confirmation of the selection by the Enter button
Instruction-Overview of the ADB RUN program

Now let's take a short look at all the menu items in the Adb Run program.
1. Is the item Device attached? - checks if the smartphone is connected to the PC (do not forget to enable USB debugging on the Android device)

2. Item Move - moving files from Android to PC and PC to Android. These items include "typical" options, as well as manual control.

3. Item Install Android App to Device - installation of applications on Android, options for settings are possible, saving data, moving to a memory card.

4. Item


7. The Manual item is responsible for itself, here you can enter commands manually, there is an item that allows you not to enter adb constantly, but to write a command right away, unlock Booltolader Nexus and Sony devices

In the additional HTC Menu, the option is to unlock the HTC bootloader, get S-OFF

8. Check Update check for a new version of the Adb Run program

10. Item Memory and Partition allows you to find out everything about the existing blocks and partitions of Android

If you have an Android phone or tablet, then you probably want to connect it to your Windows 10 device, for example, to transfer files. In this case, we recommend downloading ADB drivers for Windows 10 - special file libraries that simplify the operation of two devices on different OS.
Peculiarities
As a rule, there is no need to download ADB drivers for Windows 10 if all you need is to transfer the files. These drivers have a much broader purpose:- Transfer files from device to device;
- Get ROOT rights to Android OS;
If this version of the drivers suddenly does not suit you, then do not worry, you can always download it - this is a universal program for automatically searching and installing any drivers, including ADB.
Despite the fact that the program is completely free, it is very functional. Russian and English versions are available. For those who want to simultaneously download an anti-virus program in order not to infect their smartphone, we recommend using
Almost every owner Android a device who decided to improve his pet by replacing the firmware or kernel of the operating system encounters a program adb.
For most beginners, this particular program becomes an insurmountable obstacle, and today we will tell you how to install and get started with this wonderful application that will help you, for example, get root rights on your device, flash a new version Android or even restore your phone or tablet to its original state after unsuccessful intervention in the system.
So what is it ADB, loved by all modders and hackers, where can I get it, and why do we need it?
What is ADB.
Abbreviation ADB stands for Android Debug Bridge(Android debug bridge). ADB is an integral part that can be downloaded from here .
Since the operating system Android is a kind Linux, for its configuration it is often necessary to work through the command line. Of course, there are programs - terminal emulators that allow you to execute commands directly on the device, but, firstly, it is inconvenient to do this on a small phone screen, and secondly, sometimes you need to access the device through a computer, and in these and many other cases the program adb simply irreplaceable. Program adb establishes a connection between the device and a computer and allows you to perform various manipulations with the system directly on the computer Android.
How to install ADB.
First of all, we recommend that you download the most recent version, at the time of this writing, the version is available r11, on its example, all further description is built, and in earlier versions, the location of the necessary programs after installation SDK may differ from what is described here.
1. Download, it can be found at the link indicated earlier. There are several varieties SDK, for Microsoft Windows, Mac OS and Linux.
We need a variety for Microsoft Windows... And here you have two options - download the installer or zip archive from the Android SDK. We do not need an installer, especially since it will not allow you to install SDK v Windows 7, and therefore download the zip archive.
The archive contains a folder android-sdk-windows which contains itself SDK... We unpack it to a computer. In our example, we placed the folder at the root of the C drive. If you do the same, the path to SDK we will have this: C: \ android-sdk-windows
In earlier versions SDK inside this folder in a folder tools the program we needed was located adb, but later it was moved by the developers to the folder platform-tools.
However, if you go into this folder, you will not find the program inside it. adb, so we move on to the next step of the installation.
2.
Install SDK Platform Tools.
Make sure that our computer is connected to the Internet and start the folder located in the folder android-sdk-windows, the program SDK Manager... After starting the program, the following window will appear:
We need to download and install Android SDK Platform-tools and Android SDK Tools.
By double-clicking on an item or by clicking on " Accept" and " Reject"Check these two items in the list and uncheck all other items, as shown in the above screenshot. Then we press " Install"And wait while the components we need are downloaded and installed.
Now we have adb installed on our computer, but to work with our phone or tablet, we will need to install their driver and for further convenience with the program, it would be nice to register the path to it and other components in the Windows system.
3. If we go to the folder C: \ android-sdk-windows \ platform-tools \, then now we can find the program there adb.
After that, we need to edit the system PATH variable so that every time the program is started and commands are entered, we do not have to type the path to the program, which looks like this:
C: \ android-sdk-windows \ platform-tools \ adb
If you have never edited system variables, create a system restore point so that you can return it to its original state later.
If you have installed Windows 7, right-click on the shortcut “ A computer", Choose" properties"And in the window that opens, select" Additional system parameters».
If you have Windows XP, right-click on " My computer"And then on" Properties»
In the next window on the tab “ Additionally"Click on the button" Environment Variables". In the list " System Variables"Select the variable" path"And press the button" Change…»
A window for editing a variable will open, and in the item "h variable value"At the very end of the line, after the semicolon, add the path to the folder tools and folder platform-tools:
; c: \ android-sdk-windows \ tools; c: \ android-sdk-windows \ platform-tools;

(if there was no semicolon at the end of the line, add it - each path in this line must be separated from the other by a semicolon)
If you installed in a different folder, write at the end of the line your path to the tools folders and platform-tools.
Installing device drivers.
Certain devices, such as company phones and tablets Samsung have their own software for synchronization with a computer, and if you have it installed on your computer, then the device driver is already installed on your system.
But for devices like Nexus one that come without any additional programs and drivers to work with Android SDK, the drivers must be installed.
To do this, go to the folder where we installed SDK and run SDK Manager.

Exactly the same as we set Android SDK Platform-tools and Android SDK Tools, find and select in the list “ Google Usb Driver package". Click " Install"And wait while the program downloads the drivers. Drivers for 32 and 64 bit Windows will be downloaded to the following folder:
C: \ 1 \ android-sdk-windows \ extras \ google \ usb_driver
Now you can install the drivers for your device. To do this, in the settings menu of the phone or tablet, select the item " Applications"(Applications), and in it we include" USB debugging"(USB debugging).
We connect our device to the computer. The computer detects new hardware and prompts you to install drivers. Install the drivers from the folder where they were downloaded earlier.
After installing the drivers, a new device will appear in the device manager " ADB Interface"And we can verify this by opening it by right-clicking on the icon" A computer» -> « Properties» -> « Device Manager»
Alternatively, you can try to install a generic ADB driver on your computer.
How to start ADB
Work with the program adb best via command line Windows... To invoke the command line on a computer with Windows XP, press " Start"And in the input field" Execute»We type cmd and press "Enter".
On a computer with Windows 7, press " Start"And in the input field" Find programs and files "we type cmd and press "Enter".
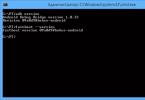
A command line window will open, and in order, for example, to see what devices we have connected to the computer, we type the command in it
adb devices.
Program adb will display a list of devices currently connected to the computer.
Need to flash Android using FastBoot, but don't know how? This article provides detailed instructions on how to use the FastBoot utility and how to use it to flash an Android device.
This manual will tell you how to use FastBoot in full! If you do not know how to install archived updates, then you need an article - Clockwordmod - what it is. Instructions for CWM recovery with pictures
Download and install FastBoot
Before flashing Android using FastBoot, you need to download and install it on the required computer.
1. You can download the FastBoot utility with the official Android SDK program (heavy weight)
why ADB RUN is better
(rutube) (/ rutube)
Launch
If downloaded Separately Fastboot
After you have downloaded and installed FastBoot, open the program “ Command line »

and vve Give commands to go to the folder with the Fastboot utility (if you have installed separately FastBoot)
cd /cd adb

If you downloaded ADB RUN
If your choice fell on the ADB RUN program, then run it and select Manual -> ADB in the menu

Instructions for commands how to flash Android using FastBoot
It is very important to write commands and firmware files as they are specified!
If you have a command specified
fastboot flash cache NazvaniAFiLe.imgthen you need to write exactly that way, but not otherwise. In other words, the case of letters is important, otherwise you will get an error cannot load ‘image’ - there is no such file.
Reboot commands into firmware mode (bootloader)
fastboot reboot-bootloaderThe command "sees" your Android PC
Get in the habit of checking before doing anything in Fastboot if the connection between your computer and Android:
Checking if the PC sees your Android
fastboot devicesExecute this command when the device is already in the firmware mode (bootloader)
Nexus Bootloader Unlock and Lock Commands
Unlock bootloader for Nexus
fastboot oem unlockLoad bootloader for Nexus
fastboot oem lockCommand find out the bootloader version
Shows the bootloader version number installed on Android
fastboot getvar version-bootloaderSection formatting commands
Before flashing any section in Android, you first need to format it so that there are no problems in the work
fastboot erase Imya_razdela - erase the partition: boot, radio, recovery, system, userdata and others
Erases the Cache section
fastboot erase cacheErases the Data section
fastboot erase userdataErases the System section
fastboot erase systemErases the Recovery partition
fastboot erase recoveryCommands for firmware section
After you have formatted the partition or partitions, you can start flashing
fastboot flash Imya_razdela imya_file.img - firmware of the selected partition: boot, radio, recovery, system, userdata and others
Flash the system partition (System)
fastboot flash system imya.imgFlash partition cache (Cache)
fastboot flash cache imya.imgFlash section date (Data)
fastboot flash userdata imya.imgFlash Recovery partition
fastboot flash recovery imya.img
Setting the turn-on animation (firmware section with animation)
fastboot flash splash1 splash.imgFlash all partitions (boot, recovery and system)
fastboot flashallInstead of imya.img- you need to write the name of the file that you are going to flash
Command to install update.zip
Flashes an update archive on Android in the update.zip format or a ZIP archive with IMG images of various sections
fastboot update filename.zipFor Sony devices
Sony device connection check, if the answer is 0.3 device then connected
fastboot.exe -i 0x0fce getvar versionUnlock bootloader
fastboot.exe -i 0x0fce oem unlock 0x Received_KeyMore Details on Unlocking Sony Bootloader - How to Unlock Sony Bootloader
Waiting for Device error
If you have a long time in the command window the inscription waiting for device- means:
- Driver not installed or incorrectly installed - reinstall or install
- Android device not in Bootloader mode - translate
- Incorrect connection to the USB port - use the rear USB 2.0 ports of the computer, do not use USB hubs
Video example of working with the Fastboot utility
(rutube) (/ rutube)
For those who did not understand anything!
For those who did not understand anything, use the ADB RUN application, this program contains almost all the commands that are needed for FASTBOOT!
Below is an example of how ADB RUN works - how to quickly flash a Recovery file using ADB RUN in less than 5 seconds (just do not forget to switch to bootloader mode first)! Click on the image to view.