what to give to mother and newborn? Breast-feeding. A child from birth to one year. I don’t want a banal rattle, but something very memorable, the baby is very, very long-awaited. set for casting handles and legs?
I have always had a peculiar attitude towards all kinds of casts of the arms and legs of babies. But today I came across something that completely changed my mind. I'm crying.
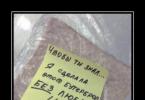
DIY casts of arms and legs. On March 8, we decided to give our beloved grandmothers a gift in the form of casts of the hands and feet of our 4-month-old daughter. To do this, take half a glass of brewed starch for 1 cup of flour and 1 cup of salt: 1 tbsp...
Foot print. Parental experience. A child from birth to one year. Care and education of a child up to one year: nutrition, illness, development. They did the same thing at 6 months, but it didn’t work the first time; I had to press in the handle and the leg quite hard.
I would like to ask about casts of arms and legs from experienced mothers who have already made these. Which option is better to buy, 3D or simple? Examples below. I just can't imagine how to make it 3D. After all, in theory, if you take your hand back, the mass should follow it and...
Section: Gifts (For happy parents the opportunity to preserve the first traces of your baby’s childhood). casts of arms and legs.
Did it go well? Did you take hand or foot prints? DIY gift for a girl. Gift for second child. graduation at kindergarten. New Year's gifts.
DIY casts of arms and legs. Foot print. Parental experience. A child from birth to one year. Care and education of a child up to one year: nutrition, illness, development. If you decided to make a cast of a child's hand or foot... Smooth embroidery, tell me.
Casts of arms and legs. - gatherings. A child from birth to one year. Care and education of a child up to one year: nutrition, illness, development. the homemade one didn’t work out the first time: (we did everything according to the instructions, but it turned out that we should have used the leg (handle) earlier, but not the hands...
DIY casts of arms and legs. The result is not so pleasing to the eyes - the blinds turn out to be vaguely similar to real hands. Rough, the fine pattern on the hand is not visible. Buy ready-made kits for making casts of children's hands and feet with modern materials.
cast of a hand and foot. - gatherings. A child from birth to one year. Care and education of a child up to one year: nutrition, illness, development. Cast: 2 cups of flour, 1 cup of salt, 3/4 cup of water, knead the dough thoroughly, make a layer 2 cm thick, wash the child’s hands and...
Handprints. How can you make casts of your baby’s hands and feet??? It seems there is some kind of recipe for dough with salt, but what are the proportions??? And if it’s not difficult, give me an idea on how to arrange all this?
Casts are prints. ...I find it difficult to choose a section. Child from 1 to 3. Raising a child from one to three years old: hardening and development, nutrition and illness. If anyone gave such a gift: casts of arms and legs in a frame, tell me where and for how much? And then we have a birthday soon...
casts. ...I find it difficult to choose a section. Child from 1 to 3. Raising a child from one to three years old: hardening and development, nutrition and illness, daily routine and Section: ... I’m having a hard time choosing a section (Tell me, please, has anyone made casts of arms / legs on their own child).
DIY casts of arms and legs. We have one like this, only the color of the frame is different, we did it at 2 months, my husband helped, the first time it didn’t work, only the third time, I rolled it out, then opened my palm with the butt, made a date with a toothpick, drew a circle with a glass and left it to dry...
Conference "Child from birth to one year" "Child from birth to one year". Section: Achievements (I want to make prints of hands and feet. And they gave us special clay. We already have a foot print ready. And in this set there is a frame for this cast, next to it...
DIY prints of children's hands and feet. METHOD 1 Make an impression of the child’s hand or foot. In the end, we didn’t bother with plaster, but made a print with paint) also in a frame. 3D casts of children’s hands and feet.
Hello! In the Oh My Baby Book you will find special pages for hand and foot prints.
We know that perhaps you have never done this before and so here you will find some tips on how to make a hand and foot print beautifully and neatly.
The footprint and handprint of a newborn are very touching memories. Believe me, legs and arms grow very quickly and the main thing is not to miss this moment and leave an imprint in the book.
We'll start with the simplest way to make a print - tracing a handle or leg with a pen or pencil. Everything here is extremely simple and success is guaranteed!
Turn out cute, beautiful and fast!
But we are not looking for easy ways. So, if you decide to make a real print, then below we offer some instructions and tips. First you need to prepare! What you will need:
A sheet of paper, preferably thick or matte cardboard High Quality, but not very dense. You can use designer paper, which can be purchased at any scrap booking store.
You only need paper if you want to make an imprint on a separate sheet, then cut it out and paste it into the book. You can skip this step and make an imprint directly in the book on specially designated pages for the imprint of a hand and foot.
Advice: If you want to make an imprint directly on a page in a book, then it is advisable to practice at least once. If suddenly you missed or something went wrong, don’t be discouraged. Make a print on a separate sheet of paper, cut it out and paste it on top of the failed print! 🙂
Paint or ink:
Option 1 - ink. A stamp pad with single-color ink, which can also be purchased at a scrapbooking store. The ink must be non-toxic and free of acids - this is important! Be sure to check this point with the seller. Ink allows you to create clearer and more durable prints.
Option 2 - finger paints. Can be bought at any children's store. They are absolutely safe for children.
Wipes: wet baby wipes and cotton towel.
Well, let's get started!
- Of course, you can make a print yourself, but it’s better if you have an assistant.
- Think about the time - the most best time, this is when the child is in good mood and doesn't want to eat.
- Wash the hand/foot thoroughly with regular baby soap, which you always use for bathing, and then dry it with a dry towel so that it is spotlessly dry.
- Open the book to the desired page or prepare a separate sheet of paper/cardboard.
- Hand the child over to dad or another assistant (position: back to dad, one hand under the arms, the other hand under the butt holding the leg).
- Apply paints or ink to your foot or palm (evenly).
- Making an imprint: for the leg, start from the heel and smoothly move to the toes, and place the entire palm directly on the sheet.
- We wipe the arm and leg with wet wipes or go straight to the bathroom and wash everything under the tap.
- That's it - the print is ready! Now we need to let it dry!


You will succeed, it's simple!
Little children grow up quickly, and you want to capture their tiny fingers and legs in your memory. Casts of arms and legs made by parents can become quite tangible things. The manufacturing process is very simple, the materials are available, and the result will delight you for many years.
You will need:
- flour;
- salt;
- water;
- plaster or alabaster;
- spray paint;
- picture frame;
- liquid Nails;
- photo of a child, decorations.


The considered option allows you to make casts of arms and legs using available materials. To obtain volumetric impressions, you can purchase ready-made sets with gel filler.
What to give your grandmother for March 8th? Gifts from grandchildren are the most expensive, so grandmothers will be happy about everything. It is especially important that the baby takes part in preparing the gift. Today I want to offer one of these gifts and I’ll show you how to make it salt dough for baby's footprint.
When I saw this idea for the first time, it captivated me. No, it’s not new, but the simplicity of its implementation immediately prompted the desire to repeat it for myself. I hope it inspires you too.
Necessary materials
- salt– 1 glass
- flour– 1 glass
- water– 1/2 cup
- rolling pin for rolling out dough
- kitchen knife
- acrylic paint
- tassel for drawing
How to make footprints on salt dough
1. Prepare salt dough
Mix salt (1 cup), flour (1 cup) and water (1/2 cup). Mix everything well to form a homogeneous dough.
The child can also help in this process. He will really enjoy kneading the dough with his little fingers.
2. Cut out the heart
Roll out the dough with a rolling pin to make it plate approximately 1.5-2 cm thick.

Cut out the heart
Place the heart on a baking sheet. I also lined it with baking paper, but this made the bottom of the heart uneven. It would probably be better to just put it on a baking sheet without paper.
I would be glad to hear your comments on this matter if you repeat the idea.
3. Footprints
With bare children's feet we make an imprint on the heart.

Footprints
We got it right the first time. Although the child practically does not stand still, in those seconds that we need to leave an imprint, he stood still, enthusiastically watching the process.
Using a spoon, make an inscription on the heart.
4. Baking in the oven
Preheat the oven up to 100 degrees and place a baking tray with a footprint for baking for 3 hours.
5. Paint the footprint
After I took the print out of the oven, I let it cool down for a while and then carefully separated the baking paper.
IN original recipe it is written that you can paint the heart almost immediately, but I have it it sat for a couple more days.
For painting I took acrylic paint . It dries quickly.

Painting the footprint
First I painted one side, and at the end of the day I painted the other.

Painting the footprint
You can also involve your child in this process. Even if it turns out less neatly, the main thing is the process. I haven't decided on this yet. We are now at an age when a child wants to do everything himself, he would not let me help, and at some point he himself could simply drop and break our print.
I am very pleased with the result. Only now you need to find deep photo frame to put our gift in it.
I didn't make a hole for hanging on purpose. The heart turned out to be not very light and could simply not withstand its weight, fall and break.
Please leave your review or comment. I'm very interested in your opinion!
Babies in their first year of life grow so quickly that parents don’t even have time to look back. But you really want to capture in your memory the moments when the baby is very small. The way out of the situation is casts of arms and legs. Buying a ready-made kit for making them is now not particularly difficult.
However, the price of such kits often raises eyebrows, and the included creative components seriously limit your imagination. How realistic is it to make casts of arms and legs with your own hands, using improvised means? It turns out that the procedure is quite simple, and you only need a few materials!
Plaster casts
How to make casts of arms and legs with your own hands using plaster? You need to take plasticine, you can even use old one, heat it in microwave oven and shape the cake to fit the footprint or palm print.
Then we make an imprint on the cake. If it doesn’t work out the first time, then you just have to reheat the mass. To make the impression clearer and deeper, when pressing, you should fix the edges of the cake so that they do not diverge to the sides.
 It is convenient to use some form with sides for this. After obtaining an acceptable result, the impression is placed in freezer for hardening. We dilute plaster for sculpture work (can be purchased at an art store) in accordance with the instructions and additionally add a little PVA glue, pour the resulting mass into cakes with impressions, and leave for some time to harden.
When the plaster hardens, carefully clean the resulting casts from plasticine and leave for about a day for final drying. Then you should lightly walk over them with sandpaper, removing roughness and unevenness. This should be done especially carefully so as not to crumble ready product. It is necessary to apply paint on top in several layers.
The most popular options are bronze or metallic silver, but the choice of color is up to you. After drying, the casts of the arms and legs (made with your own hands, by the way) are ready! They can be placed in a deep frame, mounted on a stand, or fit into the interior in any other way.
Alabaster casts

The second, no less budget-friendly way to make casts of arms and legs with your own hands is to use alabaster as a base. You need to mix five glasses of flour, two and a half glasses of fine salt, a tube of baby cream, mix. Gradually add water, achieving the consistency of plasticine.
We make cakes of the required shape and make prints of feet and palms. Place the casts in the oven and dry at low temperature until hardened. Lubricate the prints with Vaseline and fill them with diluted alabaster and leave to dry.
After complete drying, carefully remove the casts from the mold using a nail file, file, or other available means, and give them a neat shape. After this, we cover the casts with paint of the desired color and let it dry.
We looked at two of the most simple ways How to make casts of arms and legs with your own hands. As you can see, this is quite simple and accessible to parents. And the possibilities for further decoration are limited only by the range of products in the art store!
This could be a beautiful frame in nautical style for a boy, decorated with pebbles and shells, floral decoration for girl. Or you can even make an impression of the pen every month and complete it by the end of the year unusual panel, which will clearly show how quickly the baby grew during this period.