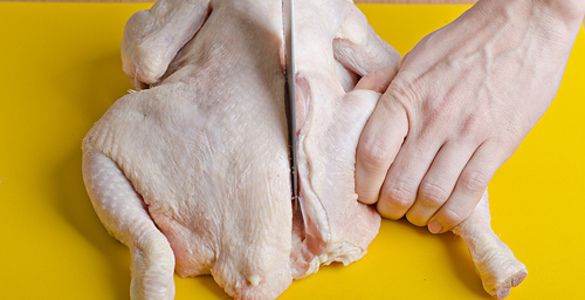
In order to cut the chicken into pieces without much difficulty, be sure to use a well-sharpened knife. Pull the leg slightly away from the body of the chicken and cut the skin with a knife, then the meat to the joint. Turn the thigh to the side so that the two bones are separated. Cut the leg from the body. Do the same action with the second leg.
The resulting parts must be divided into thigh and drumstick. At the junction of the two main bones, cut with a knife. This is done very easily and effortlessly. 
Thus, we already have 4 delicious pieces. 
Place the chicken on its side, cut through the rib bones and cut the breast with wings from the back. 
After these steps, we got a chicken breast and back for the broth. 
Place the breast on a cutting board, skin side up, and cut off the skin at the neck area. 
Now use a knife and your hands to detach the cartilage bone in the center of the breast. Cartilage is also great for making chicken broth. 
Cut the chicken breast into two equal parts. 
Now cut each half of the breast into two parts, just below the wing. Thus, we got 4 more meat parts. 
Cut off the top of the wing and use for broth. 
As a result, we received 8, almost identical pieces of meat that can be used to prepare mouth-watering dishes. 
And from these parts you can prepare aromatic chicken broth for first courses and sauces. Now you know how to cut chicken without much effort. 
Cook with pleasure!
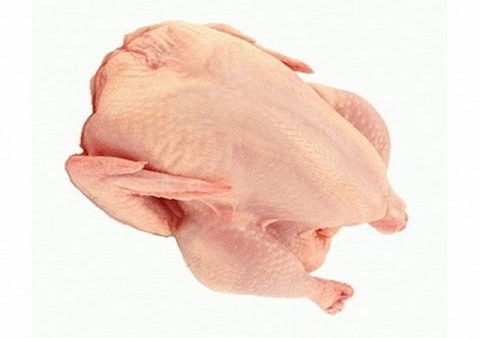
Sooner or later, you may need the ability to cut chicken into portioned pieces, both raw (for freezing or preparing various dishes) and already thermally cooked. Which chicken is best to choose, and how to defrost it correctly? What should you use for this? A step-by-step guide to cutting raw and fried poultry in the review will help you find answers to all your questions. 
Rules for selecting and defrosting chicken
When purchasing a chicken carcass, experts recommend paying attention to the following:
- a good carcass has a rounded breast, the keel bone does not protrude. In older birds, the breast bone no longer springs as well as in a young chicken;
- all parts of the carcass must be proportional, but if the sternum is too large in comparison with the legs and thigh, then this may indicate the use of hormonal drugs during cultivation;
- the bird must be well gutted and feathered;
- defects on the external surface should not be visible(no fractures, hematomas, blood clots);
- If you press on the meat, there should be no dent left. Fresh meat restores its shape well, otherwise it is better to refuse such a purchase;
- the meat of young chickens has a light pinkish color, thinner and whiter skin, and the fatty deposits are pale yellow in color. An old chicken's skin will be thicker and oilier, with a yellow tint;
- a fresh carcass will smell good and not emit a suspicious “aroma.” An unpleasant smell of sourness, rotting or dampness is unacceptable;
- The fact that the bird is fresh is indicated by dry and clean skin. If there is sticky, slippery skin, the conclusion is that the chicken was probably sick and was treated with antibiotics. Such signs also indicate a low-quality product;
- choose chilled meat. It better preserves its taste and beneficial qualities. But after freezing, the meat already loses its quality and becomes somewhat harsh;
- Sellers and manufacturers, in order to obtain more weight (and, accordingly, the amount from sale), cheat by soaking chicken carcasses in water. After such treatment, the carcass gains up to 20% in weight;
- take a good look at the packaging. Choose a transparent one through which everything can be clearly seen. It must not be damaged;
- if there are pieces of pinkish ice under the packaging, this indicates that the bird was frozen and defrosted several times;
- the packaging must have State Veterinary Supervision inspection marks and GOST instructions, veterinarian’s registration number, as well as information until what date storage can be carried out;
- chicken is chosen depending on the recipe of the dish that is planned to be prepared. For first courses, choose carcasses weighing 2 – 3 kg. Please note: the older the bird, the richer the borscht. Homemade chicken is perfect for delicious broths. It is best to bake, fry, and stew broiler chickens weighing up to 1 kg. They are ideal for preparing second courses.
- Look for the “chlorine-free” label on the label. If it is not there, you should refuse the purchase;
- Look carefully at the expiration date. If the shelf life is more than 7 days, then preservatives may have been used.
Did you know? Chicken meat (especially the sirloin part) is ideal for athletes. This product is low in fat but has decent protein content.
If there are no plans to cook the chicken on the day of purchase, then you need to freeze it.  Now about defrosting. Chicken meat should be defrosted on the refrigerator shelf or in cool water. It takes approximately 24 hours to defrost a 1.8 kg carcass in the refrigerator, and 3 hours will be enough to defrost parts of the bird. –
9 o'clock.
Now about defrosting. Chicken meat should be defrosted on the refrigerator shelf or in cool water. It takes approximately 24 hours to defrost a 1.8 kg carcass in the refrigerator, and 3 hours will be enough to defrost parts of the bird. –
9 o'clock.
You need to defrost the bird in water by placing it in a plastic bag. The water should be changed several times. This defrosting will take 2 hours.
To quickly defrost chicken meat, you can use the microwave. Defrosting time will depend on the size of the carcass or its parts. The chicken (or parts of it) should be turned as it thaws to prevent it from browning. It is covered with a special lid on top, which will protect it from splashing.
Important! It is worth noting that defrosted chicken should not be re-frozen, as it loses its taste and nutritional value. In addition, such a product is subject to longer heat treatment, since during the process of repeated freezing and thawing, bacteria have time to multiply in it.
Why is it so important to properly cut a chicken?
Chicken parts are purchased faster than whole poultry carcasses, but, in general, they are already somewhat more expensive. Purchasing and properly butchering a whole chicken will allow you to use it most economically. So, you can make preparations for the planned dishes: select a set for soup, meat for main courses, cut off a piece for salad.
Before freezing in the refrigerator, it is better to divide it into parts for preparing the appropriate dishes and place them in separate bags. Air should be removed from the bag before sealing.  Proper cutting of a chicken carcass into pieces allows you not to take up much space in the freezer, and will also save time on preparing certain dishes.
How to cut a chicken into pieces?
You can cut a chicken into pieces in a very short time. The first time it won't be so fast, then get used to it.
What you need
Already thawed or purchased chilled chicken should be washed and dried with napkins. To cut it, you need a sharp cutting knife or special pruning shears, as well as a cutting board of sufficient size. For processing leather, it is recommended to use a serrated knife (but you can get by with the same well-sharpened cutting knife everywhere).
You also need a container in which you will put the cut portions.
Did you know? Due to the content of useful substances, chicken meat is well processed in the human intestines. It contains B vitamins, iron, sulfur, phosphorus, selenium, calcium, copper and magnesium. This product helps prevent heart attacks, ischemia, strokes, reduces blood pressure and improves metabolic processes in the body.
Step-by-step cutting instructions
Cutting raw chicken is similar to cutting fried poultry, but is done for a different purpose.
How to cut a chicken into pieces: video
Raw chicken
To cut raw chicken into pieces, follow these steps:

Important! Be sure to wash your hands with soap and water after handling raw meat, as it may contain disease-causing bacteria.
The limbs (wings and legs) are good for stewing or baking. Breast meat is often used for minced meat products and salads (it can be used in almost all dishes). Trimmings, back and bones are used to prepare broths. 
Fried chicken
If the chicken has just been taken out of the oven, then it should be allowed to cool slightly (about 15 minutes).
Did you know?Ready chicken, when cut into pieces, retains its taste for 2 days, and if it is left whole - up to 3 days.
In order to cut it into pieces, the steps are as follows:
- Turn the chicken breast side up.
- Hold the finished bird with a carving fork and cut the skin between the carcass and the leg.
- Do the same with the meat between the tail and the thigh line at the joint closer to the lower back and bend the leg until the joint separates. Cut until the leg is completely separated from the whole part.
- Make a small thin cut and look for a layer of fat between the bones, along which you can continue cutting.
- Repeat the same with the other leg.
- Make an incision along the sternum and, when you reach its branch, make cuts along it.
- With the knife tilted at an angle to the cross bone, cut the meat lengthwise to the wing.
- Cut between the breast and the wing, bend the wing back and cut it off at the joint. Separate the second wing in the same way.

When cutting up chicken and preparing dishes from it, you must adhere to the following recommendations:
- wings and legs are fried and stewed. Breast and fillet go well for cutlets and chops, as well as for preparing salads. The back with trimmings and other bones are well suited for broths;
- You need to cut the chicken carcass along the joints;
- First of all, when cutting, the legs are separated (completely or cut into thighs and drumsticks). Then the wings and breast are separated. The remaining frame is broken into pieces for ease of storage and use for cooking for broth;
- When preparing stuffed chicken, the bones are usually removed. To do this, carefully cut out the thigh bones and separate the meat from the bone;
- The carcass for the festive roll is cut using a different method. All bones are carefully removed from it.
Cutting a chicken into pieces (either raw or fried) is not difficult. All you need for this is a sharp carving knife, a cutting board and the bird carcass itself. Step-by-step instructions will also come in handy.
Compliance with the temperature regime, processing duration, and order of operations is a guarantee of obtaining a carcass completely ready for storage.
Bleeding
After slaughter, the bird is immediately hung upside down. This operation allows you to completely bleed a chicken carcass.
The time allotted for this operation is from 1 to 2 minutes. The length of time the chickens remain in limbo depends on:
- type of bird;
- type of bird;
- method of slaughter.
Pen compartment

Water temperature for processing young birds – from +51C to + 53C. Dip into water for 1 - 2 minutes. It is permissible to immerse an adult bird in hot water with a temperature from +55C to +60C for 30C.
First, remove the largest, toughest feathers from the tail and wings. Next, the abdomen, legs, shoulder area and neck are plucked. Small feathers are removed after heat treatment much easier than with the dry method.
Down and feather processing
 The feathers are sorted and sorted by size: large ones into one container, down and small feathers into another.
Feathers and down are valuable raw materials. It is used to fill mattresses, pillows (small feathers), and for sewing collars and hats (down feathers).
Feathers are cleaned in the following way:
- washed in warm water with a solution of detergents;
- rinse well to remove any remaining soap or powder;
- squeeze;
- dry for 48 hours. Recommended drying temperature: + 70C…+80C. Final humidity percentage: 12%.
You can dry your feathers well at home using large gauze bags. Fill bags with feathers and hang them from the ceiling in dry, well-ventilated areas.
During the drying process, shake the bag several times to avoid caking of the contents. To store the pen, you need to choose a room with good ventilation and low humidity.
Gutting a bird
 Before gutting, the oral cavity is cleaned of any remaining blood. The bird's throat is squeezed and, by moving your fingers, the clot is pressed out. After the blood plug has come away, the incision site is thoroughly cleaned of drops of blood.
The beak is wiped dry. A paper swab is made and inserted into the oral cavity. The beak and legs are washed well, dried and the chicken begins to be gutted.
Internal organs are removed. Most of them are used later. By-products - heart, liver, stomach without shell - are tasty and healthy. They are eaten. The lungs, esophagus, spleen, trachea, ovaries and testes are boiled, crushed and used to feed poultry.
After removing the entrails, the head is cut off along the second cervical vertebra, the legs are cut off up to the heel joint, and the wings are cut off up to the elbow joint. The processing process is completed.
The bird is thoroughly washed in cold water and left at room temperature for 2 to 8 hours. During this time, the chicken carcass cools completely and the meat ripens. It acquires a pleasant smell, becomes juicy and tender.
Post-mortem rigor in birds occurs quite quickly. It is enough to keep gutted young birds from 2 to 4 hours, old chickens - up to 8 hours. The chicken can then be eaten or stored.
Storing chicken meat
There are different ways to store chicken. There are short-term and long-term storage.
Short term
3–5 days. Chicken carcasses are placed in the refrigerator. Temperature: from 0C to -4C. If you don't have a refrigerator, remember the old way to preserve chicken. Soak a clean cloth in vinegar and wrap the meat. The fabric should remain damp.
Long-term
2–3 months or more. For long-term storage, poultry must be prepared in a special way. There are several ways to prepare poultry for long-term storage.
Methods of preparation
Freezing
Over the course of 12-18 hours, the carcasses are gradually cooled to a temperature of -2C...-4C. Afterwards they are frozen at a temperature from -12C to -18C.
Ice Shell
 During the winter, rural residents store gutted chickens in an ice crust. Nothing complicated:
- the chickens are taken out into the cold and dipped in water;
- freeze in air;
- dip again;
- freeze again;
- the process is repeated up to 4 times until the chicken is completely covered with a crust;
- wrap the carcass in parchment. Store at temperatures from -5 to -8C.
A layer of ice protects the carcass from the penetration of microbes. The bird can be stored in an ice shell for up to 2-3 months. Sprinkle the carcasses with straw or sawdust.
Be sure to take the box with the “ice chickens” out into the cold. Poultry should be defrosted gradually before cooking. This will preserve the quality of the meat.
Pickling
 A gutted carcass can be salted in a strong saline solution. For 1 kg. poultry will need 150 ml. solution.
Step by step:
- 300g of table salt is well dissolved in a liter of water;
- using a syringe, pour a saline solution through the bird’s mouth;
- bandage the neck well;
- hang the carcass by the legs;
- leave for 20 hours at temperatures +22C...+23C;
- at the end of the period, the brine is drained;
- stored in the cold.
Tip: the strength of the solution is easy to check. If the boiled chicken egg does not sink, it means you have added enough salt.
Dry pickling
With this method of salting, meat can be stored for more than six months. The prepared chicken is rubbed with salt and placed in a barrel. Each carcass is well sprinkled with salt.
Stored in the cellar. After 2-3 weeks, the bird is taken out and spices are added to the salt: black pepper, clove buds. If desired, add a bay leaf. Repeat the process of laying chicken. The barrel is put back into the cellar.
Smoking
 A popular way to store chicken carcasses for a long time. Procedure:
- chickens are salted dry, after cutting along the chest line;
- salt (1 kg) is mixed with sugar (20 g) and ground black pepper (5-10 g). This amount of salt is for 10 medium chickens. After 2 days, a load is placed on each carcass. Weight: 2-3 kg for every 10 kg of chicken;
- small birds are salted for up to 4 days, large birds for up to 6 days. The salt is washed off the carcass under cold water and dried at room temperature;
- if you want to consume meat within a short period of time, use hot smoke at a temperature of up to +80C. Maintain this temperature for the first hour. In the next 2-3 hours, reduce the heat and bring the temperature to +35C...+40C;
- For long-term storage of chicken carcasses, smoking with cold smoke at a temperature of +20C is more suitable. The process is long – up to 3 days;
- The finished carcasses need to be thoroughly wiped off soot and soot. Store smoked meats at a temperature not exceeding +5C. The room should be dry.
Canning
 Simple, fast, tasty. Cooking process:
- cut off all the fat, melt over low heat for 45 minutes - 1 hour;
- the chicken is boiled until cooked, placed in processed, steamed, clean jars;
- the prepared meat is poured with chicken fat. It covers the meat with an airtight film. If there is not enough fat, add goose or duck fat;
- white paper is moistened in alcohol or vodka, the jars are covered and tied tightly with twine. Store homemade canned chicken in the cellar.
If you are raising chickens to produce nutritious and tasty meat, be prepared from the very beginning that you will have to slaughter the bird, process it and further process the carcasses. The right psychological attitude is very important.
After slaughter, gut the bird, cut it up and think about how to store it. It would be reasonable to prepare part of the meat for use in the near future, and prepare the rest for long-term storage. Then you will be provided with valuable dietary meat for a long time.
If you find an error, please highlight a piece of text and click Ctrl+Enter.
Every poultry farmer has to face the question: how to cut up a chicken carcass. For many, only the speed of the unpleasant process is important. Few people think about the correctness of actions. Meanwhile, competent processing has many advantages.
Before hitting store shelves and tables, a chicken carcass goes through several stages of preparation. The following are produced sequentially:
- slaughter A fattened chicken is caught by the legs, placed in a confined space, and given water to completely cleanse the intestines. The bird is then killed by electrocution or mechanical means (cutting off the head or cutting the arteries);
- bleeding. The bird's body is hung upside down so that all the blood drains into the prepared container;


- plucking. The feather covering is removed mechanically or manually from the still warm carcass and washed;


- evisceration. The internal organs are removed from the chicken;
- cutting The resulting carcass is cut into portions.
Why is it so important to learn how to properly cut up a chicken?
The quality of carcass processing directly affects the taste of the meat. If the intestines or spleen are touched during gutting, the organ fluid will flow out and be absorbed into the pulp. Such chicken will have an unpleasant odor and bitter taste.
In addition, professional cutting skills allow you to use parts of the carcass as economically as possible. Knowing the nuances, it is easy to make preparations for a soup set, meat for frying, baking, salads, separate fillets for minced meat and pieces for feeding animals. For farmers, this is also an undeniable plus, since semi-finished products sell better than whole chickens.


Proper cutting is also rational from the point of view of allocating space in the refrigerator and freezer. The carcass takes up a lot of space, while even pieces are easily laid out like “Tetris”.
Finally, an organized, streamlined process takes less time and stress. Perfected movements are performed quickly, a minimum of waste eliminates lengthy cleaning.
Preparation for cutting
Before starting work, you need to prepare tools and space. Gutting is a rather dirty process, so it is preferable to cover the surface of the table, surrounding equipment and furniture with oilcloth. It is advisable to protect your clothes with an apron and put on cellophane or rubber gloves on your hands.
For the operation you will need:
- board. It is better to use an option made of flexible or hard plastic. Wood absorbs all odors and juices, and glass may not withstand pressure. If you choose a wooden option, you should wrap the device in cellophane or use a board exclusively for cutting meat;


- dish or pot. The removed giblets or finished pieces will be placed in the container. To make cleaning easier, you can immediately line them with cellophane;
- knives. There are special knives for gutting and cutting with a curved end. If this is not available, you can get by with wide and narrow knives made of thick steel and with a strong handle;


- cutting fork. Allows you to remove the heart, lungs, liver, intestines, crop, and stomach from the carcass without damage. The action occurs with a minimum of effort, unnecessary movements and dirt;

- kitchen scissors. Good for cutting tendons of wings and legs. Replaced with a knife.


Prices for meat cutting knives
Meat knife
This set is considered ideal, but you can get by with a couple of knives of different sizes. Tools must be well sharpened and washed before starting work.
When the tools are collected, the final stage of preparing the carcass is carried out:
- Amputation of head and paws. If decapitation is not carried out during slaughter, it is easier to carry out with a culinary or household ax. The paws are cut off along the tendon near the lower cartilage or also chopped off;


- A neat cut is made around the anus, being careful not to touch the intestine. There is no need to rush at this stage. The resulting piece is thrown away. In the case of roosters, notches are made on the tail to expose the yellow glands - the testes, which will be removed further;

- The skin around the neck is incised. The goiter is pulled out with effort but smoothly. With a normal incision, the tubes of the larynx and esophagus will come out after the goiter. If the chicken is slaughtered according to the rules, the crop will be free of food residues and will not create dirt;

- Opening the skin to the keel. To ensure that the internal organs are visible during evisceration, a small skin incision is made from the resulting rear hole along the body. Then the skin will crack on its own or you can tear it with your hands.
Gutting
Preliminary operations are completed. You can begin direct gutting. It is advisable to carry out the process as soon as possible after plucking. This way it will be possible to avoid rotting and fermentation of waste residues in the gastrointestinal tract. This chicken processing step by step is as follows:

This is where the gutting ends. Processing of food giblets is carried out. Fat and arteries are cut off from the heart and lungs. The liver is freed from the spleen. The stomach is incised, everted, and the contents and inner layer of rough skin are removed. The resulting products are washed with running water.


A lighter version of gutting can be done using a carving fork. After removing the anus, crop and intestines, it is inserted into the carcass. It is important not to damage the organs. All connections will be cut off by the sharp edges of the device, the insides will remain in it, they will be easy to remove. With good skill, all films and “fastenings” can be cut with a thin, sharp knife. Then turn the chicken over a plate and shake lightly. The giblets will fall out on their own.

There is a trick for cases where the bird is not originally intended for cooking or selling whole. In this version, the process is accelerated by cutting off the legs and opening the abdomen immediately after amputation of the anus. The body will open completely and it will be easier to remove the entrails.
Video - Gutting a chicken or rooster in 8 minutes at home
Cutting chicken at home
The term “cutting” refers to the final processing of the carcass with cutting into pieces. This operation can be carried out in various ways depending on the purpose.
What's the best way to disassemble a bird?
The method for disassembling the carcass depends on the plans for the meat. The whole chicken can be grilled, oven-baked, or boiled. For other cooking methods, chopped versions are used. Different parts are suitable for different dishes, so choosing the type of parsing is a crucial step:
How to cut up chicken without waste
First of all, the carcass is washed under water and dried so that it does not slip in your hands. Then place it breast side up on a cutting surface. The following actions occur step by step:
Step 1. Make cuts at the junction of the thighs and torso. Holding the leg, the leg is pulled back to separate the joint, slightly turned inside out and the final cut off from the body is made. This stage can be supplemented by separating the thigh and lower leg. The joint of the joint is felt with fingers and cut with a knife.


Step 2. Cut off the wings. Pull and turn them out in the same way as chicken legs. When the humeral cartilage comes out, cut it off from the carcass. The final sharp element can be cut off along the cartilage or left.


Step 3. Cut the breast lengthwise. Remove the fillet from the bone using a blade. You will get two pieces of pulp and a back connected to the ribs.
Step 4. Cut the spine down the middle. Cut off the ribs from the back. The step is optional; it is made if necessary to obtain smaller parts.
Step 5. Remove excess fat from the resulting chicken elements. Also done at personal discretion.


The result is:
- breast fillets, thighs, drumsticks and wings - for frying, boiling, stewing, baking;
- back, ribs, wing tips - for cooking broth;
- fat - for frying.
Video - How to cut chicken without waste
How to cut a chicken carcass into 8 parts
This cut includes 8 pieces. It is considered a classic. It can be modified by cutting the breast into 10 parts. The ideal tools are a sharp knife and kitchen scissors.
Step 1. Find the joint of the hip joint in a carcass lying on its back and carefully cut through the flesh. Then insert the knife into the joint of the cartilage and cut it. Or pull the thigh with your hands until the bone pops out of the joint.


Step 2. Turn the chicken onto its stomach. Make an incision along the flesh of the thigh along the back. It should go around the entire perimeter of the thigh.
Step 3. Separate the drumstick and thigh at the knee joint. A clue to the correct location of the incision is the fatty stripe at their border.


Step 4. Cut off the wings. Feel the joint between the carcass and the wing under the breast. Point the knife directly at the joint. The separation will take place without any extra effort.


Step 5. Remove the breast. For this operation it is better to use scissors. This way the cut will be as neat as possible. Place the carcass on its side. Cut through the border of the back and breast along the fat strip from beginning to end. Repeat on the second side.


Prices for kitchen scissors
Kitchen scissors
Step 6. Remove the sternum bone. Turn the breast skin side down. Make longitudinal cuts on both sides of the cartilage. The meat will come away from it. Through the resulting incisions, grab the bone with your fingers just above the junction with the cartilage. Pull forcefully. The hard elements will leave the soft fillet.


Step 7 Cut the resulting breast vertically into two parts. It is most convenient to do this from the skin side.


The result is 8 pieces:
- 2 breasts;
- 2 hips;
- 2 drumsticks;
- 2 wings.


The back in this version is considered a waste, but it can be used for cooking broth.
How to cut chicken into equal portions
For such cutting you will need to fill your hand. It may not work out the first time. Only persistent training will ultimately allow you to achieve even, beautiful pieces.
Step 1. Place the carcass on its back. Cut off the legs at the cartilage joints. The process will become easier if you press the leg against the work surface, make an incision in the flesh and slightly turn the thigh out. The cartilage will open and it will be easier to find the place of articulation.

Step 2. Cut the drumstick from the thigh at the bend.
Step 3. Divide the remaining carcass into 2 halves. A pair of vertical incisions will be required along the spine and sternum (on either side of them).
Step 4. Cut the pieces obtained in the third stage horizontally in the center into 2 parts each.

The result will be 8 pieces, almost identical in size:
- 2 drumsticks;
- 2 hips;
- 2 lower breast halves;
- 2 upper breast halves with wings.

This treatment looks especially impressive when grilled or frying in a pan. The bones with pieces of meat remaining in the waste are suitable for broth.
Separating meat from bones is useful when preparing minced meat, meat rolls, and semi-finished products from the pulp (breast and thigh fillets). It is important not just to be able to cut meat, but to maintain a presentable appearance of the pieces. The highest aerobatics is considered to be removing bones from the entire carcass without damaging the skin. Farmers supplying chicken products to restaurants may encounter this unusual order. Such skill is appreciated and is an undeniable advantage for the seller.

For such processing, the knife must be as sharp as possible. It is advisable to sharpen it specifically for this purpose. The tip needs to be thin. Scissors will also come in handy.
Public method
| Description | Photo |
|---|---|
| Incise the skin vertically along the entire back. You can start in the same way with the breast, but this increases the risk of tearing the carcass. The bones in the dorsal part are located very close to the skin and, when pressed, easily damage it. |  |
| Using gentle movements of the knife, begin to peel the meat from the skeleton. The direction of movement is from the tail from bottom to top. Break the ischium, hip and wing joints. Expose the ribs. Help yourself move the pulp with your hands. |  |
| Release the femur completely. To do this, trim the veins in a circle and move the meat with your fingers. |  |
| Maintaining the connection between the thigh and the body, scrape off the flesh with a “stocking” to the outer cartilage. Upon reaching the bottom point, cut the upper joint. |  |
| Turn out the resulting stocking. Repeat all steps on the second side. |  |
| Trim the ribs with scissors. Remove the fork and keel bones, trimming the remaining joints. |  |
| The wings remain on the carcass directly with the bones or are cut from the skin in an even strip. The process is complete. |  |
Private method
| Description | Photo |
|---|---|
| Through the lower hole in the carcass (through which gutting is also carried out), cut the tail and expose the ischial frame. |  |
| Make an incision with jerky movements up to the upper femoral cartilage. For convenience, tuck the skin and pulp a little during the process. Break the joint with a blade at the junction. |  |
| Trim the veins around the entire circumference of the ham bone. Break the maple joint at the point of contact with the shin. Repeat the above on the other side of the carcass. |  |
| Trim the meat from the ribs to the neck, continuing to tuck the skin with the flesh already removed. |  |
| Take out the skeleton. Turn out the skin and meat. |  |
The closed version is ideal for stuffing a carcass. Using the above diagram, you can peel meat from chopped pieces. The only difference is that you don’t have to worry about the integrity of the skin.
Video - Removing bones from chicken
Video - How to remove bone from chicken leg
Secrets of successful chefs
All chefs have their own tricks when cutting poultry. According to world-famous masters, it is useful to pay attention to the following details:
- freshness. It is better to carry out all processing on a fresh carcass. Frozen poultry must be completely defrosted, washed and dried before cutting;

- the right tool. Dividing chicken into pieces requires a large knife; separating the flesh from the body is more convenient to do with a small tool. Good cutting scissors have serrated blades;


- tendon removal. Poultry fillets contain tendons - one each in the major and minor muscles. If they are removed, the meat will be softer and will not shrink when cooked. The end of a sharp knife is used to pick up both tendons in turn. The blade is drawn along the fiber until it comes out completely;
- help of fingers. Remove the skin, slide the meat off the bone, the easiest way to find the joint is by touch. A knife cannot be as careful as your own hands;
- separate storage. Parts of the carcass are placed in the freezer separately from fish and vegetables. In the refrigerator, raw chicken is placed below products that are consumed without heat treatment. This way, odors will not permeate the food or spoil its taste;

- Each piece has its own preparation. The taste of dark and white meat is most beneficial when used correctly. Processing in the wrong way can dry out the pulp, kill its best qualities, and destroy useful microelements.
Usually, most housewives cut up a chicken carcass as is customary in their family. But not everyone knows that there are general rules that allow you to do this faster and more rationally. Information on how to properly gut and cut up a chicken will be useful for both experienced housewives and those who are just starting to try their hand at this business.
After slaughtering and plucking a chicken, it should be gutted. Moreover, this must be done as soon as possible, since the insides quickly disappear. To work, you will need a medium-sized sharp knife or scissors for cutting, oilcloth, plates or bowls where you will need to put offal and waste, a cutting board made of wood or plastic.
In order to gut a chicken at home, follow the following sequence of actions:
- Cover the table on which the carcass will lie with oilcloth so as not to smear it with grease.
- Place the carcass with its back down, cut off the legs: bend the legs at the knee joint and cut the tendons with a knife.
- Cut out the anus in a circular motion. This must be done carefully so as not to puncture the intestines.
- Then cut the skin of the bird from the anus to the keel along the center line of the abdomen. You need to cut shallowly so as not to touch the abdominal organs.
- Remove the entrails and place them in a bowl: the intestines separately into the waste, the stomach and liver into another container. When cutting out the liver, you must be extremely careful not to accidentally damage the gallbladder and spleen. It is easier to remove them when the liver is already removed from the carcass.
- Remove the goiter with the esophagus. To make this easier, the crop should be empty. To do this, before slaughtering, the bird must not be fed for about 12 hours. If for some reason the crop is full of food, it can be removed through an incision in the skin.
- Remove the genitals: cut out the testes of roosters and the ovaries of chickens.
- Remove the lungs and heart.
- Clean the stomach: cut it open, turn it inside out, remove any remaining food and peel off the inner lining.
- Rinse the carcass and giblets with cold water.
Once you've finished gutting the chicken, you can start cutting it up.
How to choose a carcass in a store
When purchasing a chilled chicken carcass, you need to pay attention to its freshness. You can identify fresh chicken by the color of its skin, the elasticity of its muscle fibers and its smell. How to do it:
- Inspect the carcass. If it shows bruises, damaged skin, and is yellow-gray in places, it is better not to buy it. The color of the skin and its thickness will indicate the age of the bird. In young chickens it is thin and pink, in old ones it is thick and yellowish.
- Touch the carcass, press with your finger. If it is fresh, there will be no indentation from the finger, the fibers will quickly return to their previous state.
- Smell the chicken. Fresh meat has a pleasant aroma, but stale chicken does not have it and acquires foreign odors.
This is enough to choose a fresh carcass in a store or market.
Chicken cutting procedure
If you do not intend to cook the carcass of an adult chicken or broiler whole, they need to be cut into small portions. There are several ways to cut up chicken carcasses for various dishes.
No waste
This method allows you to cut the chicken most profitably, so that waste is minimal. Step-by-step instruction:
- Place the bird on its back, grab the leg, pull it to the side and cut to the joint. Turn the joint to the side and cut off the leg completely. Do the same with the second leg.
- Separate the wings from the carcass: cut the shoulder joint, move the wing to the side and cut it off with a sharp knife.
- Cut the bird carcass in half along the spine.
- If the chicken is large, then its halves can be cut into 2 more parts.
Wash the resulting pieces and put them in the refrigerator freezer for storage.
For portioned pieces

This method allows you to cut the chicken into portioned pieces, almost identical in size, which can be served after cooking. Here's how to do it step by step:
- Place the carcass on its back and make a longitudinal cut from the lower abdomen to the neck.
- Use a large knife to separate the halves of the carcass from the back bones, cutting through the ribs on both sides. Set the ridge aside (later it can be used for broth).
- Take one half, place it on the board, cut off the upper part of the wing to the first joint (send it into the broth), then the part to the next joint, and then the rest of the wing along with part of the carcass.
- Cut the breast into 3 parts.
- There is a leg left that needs to be divided into thigh and drumstick at the joint.
- Do the same with the other half of the chicken.
This way you can get 12 portions. Cut up chicken breast will be used as fillet. You can make chops, cutlets from chicken fillet, boil it and put it in a salad.
Boneless
From chicken cut according to this scheme, you can prepare various dishes, including minced meat, rolls, and semi-finished meat products. But in the process of cutting chicken this way, you need to be able to not only accurately cut the meat from the bones, but also do it in such a way that the pieces retain an attractive appearance. To do this, be sure to take a thin, well-sharpened knife.
There are two ways to remove bones from a chicken: open and closed. If you follow the first one, then you need to do this:
- Cut the skin vertically along the entire back.
- Gradually separate the meat from the bones, moving upward from the tail.
- Break the ischium, hip and wing joints.
- Use a knife to score the meat and remove it from the bones.
- Having reached the upper joint, break it too.
- Turn the meat inside out and do the same with the other leg.
- Cut off the ribs, keel and fork bones, and wings with scissors.

Closed way:
- Cut the tail and remove the meat from the seat to the upper cartilage of the thigh.
- Cut the joint and veins around the circumference of the leg.
- Break the joint where the shin and thigh meet.
- Do the same on the second side of the carcass.
- Trim the meat together with the skin with a sharp knife from the ribs to the neck, cut off the neck.
This method is suitable for preparing stuffed chicken and chicken rolls.
For roll and stuffing
To prepare a roll from a whole carcass, you need to remove the bones and separate the meat from the frame, gradually turning it inside out. Then it can be boiled, wrapped in cling film, or baked in the oven, stuffed with vegetables, mushrooms or other suitable filling. You can even skin the whole chicken, minus the meat, and stuff that too.


