Lighting devices can not only dispel the darkness, but also give an unusual aura to your interior.
There are many different ideas with which you can make a wall lamp or any other type of lamp with your own hands.

You yourself are able to create a masterpiece that is not in any store.
Creating an extravagant chandelier
A very original thing is obtained from the simplest materials, most of which can be saved after a picnic. Lamps from various containers will look spectacular.

For this you will need:

- oval plastic bottle with a capacity of 5 liters;
- disposable spoons;
- cable with cartridge and plug;
- low power LED lamp;
- pliers;
- glue gun;
- screwdriver;
- stationery knife.

To avoid fire, use only LED bulb!

With a knife, carefully cut off the bottom of the bottle, then remove the handles from all plastic spoons. Apply a small amount of hot glue from a gun to the cut point, glue them on the bottom of the container.

Approximately you will need about seventeen pieces. Place the next and remaining rows in a checkerboard pattern.

In order to hide the neck of the bottle, put ten to twelve spoons without a handle on the glue so that they form a ring.

Pull the cartridge with the lamp and cable through the hole at the bottom of the bottle.
If you do not want to make this part yourself, you can purchase it in any department of household goods - the wire, socket and plug are already connected together.

Make a hole in the lid for the cord by drilling it with a drill or a hot self-tapping screw. Screw on the lid, put on the previously prepared ring of spoons on top. The exclusive LED luminaire is ready for operation.

A few ideas for creating lampshades
It is enough just to create a lamp from improvised materials for a house or a summer residence.

Idea N1
- any hollow dishes (it can be an old pan or flower pot);
- wire;
- polyurethane foam and gloves;
- paint and brush;
- sharp knife;
- pliers.

Place the object taken as a basis upside down. Wind the wire around the product the way you want to see the lampshade, since all the turns copy its shape. Put on gloves and squeeze the foam a little bit onto the frame so that it completely covers the wire, leave to dry.

Then, using a knife, give the contours more evenness and paint in any color. This option will be the best for a street lamp.
Idea N2 is a classic
- thick wire;
- pliers;
- small water bottle.

Note!

To make the upper central element on the bottle, wind a coil of wire, then remove it and cut off the excess. The ends must be fixed so that they form a ring whose diameter should allow the cartridge to pass through at the bottom, and prevent it from coming out at the top.

Next, you need to make a large outer ring from the wire. To secure it, you will need four equal pieces of wire. Connect one edge of each with a small one, and the other with a large ring. The upper part of the lamp is ready.

The largest will be the lower circle of wire, it must be attached to the second upper one, evenly placing five identical pieces of wire.

To decorate the frame, pass the wire through the second upper ring, giving it a wavy shape, wind it onto the base. Do the same for the bottom ring.


Note!

On a walk through the forest, take an interestingly shaped branch with you, an excellent wooden lamp will come out of it. Wash the branch and peel off the bark from it with a knife, varnish it for wood. For good stability, screw the lamp to a heavy stand with screws, it can also serve as a tree.

A better option is an oak, find a broken branch and saw off a circle of at least five centimeters thick from it. Coat it with varnish or paint it too.
Making a lampshade with children
There is an option for making a lampshade with children. For the frame, you need a canister or bottle with a capacity of five liters. You need to roll the paper strips into a tube, it is best to wind them around a pencil or sushi stick, then glue the remaining edge with glue.

These blanks must be glued to the frame in several layers so that there are no gaps. When the glue dries, you can put the lampshade on a table lamp or make a ceiling lamp that looks very unusual.

Experienced needlewomen can knit or crochet a lampshade, decorating it with knitted flowers and ribbons.

To give the product the correct shape, you can use a starch solution or ordinary PVA glue. Look at the proposed photos of knitted lamps, how much tenderness and comfort they have!
Note!


This article told you how to make a lamp with your own hands. Using the information received and your own imagination, now you can create an exclusive lighting fixture for any room.
DIY lamp photo


Taking on the arrangement of the interior space, it is important to think through every little thing. After all, we all subconsciously strive for comfort and it is the smallest details that can create a special atmosphere, convey the general idea, mood and character of the room. Professional designers say, and the interiors clearly prove that the right choice of a chandelier can not only decorate the interior of a room, but also make life brighter and more fun. Beautiful chandelier shades with an original design give a special grace and gloss to the lamps. About how to make them with your own hands and what materials it is better to use for this, you can find in this article. A detailed, step-by-step master class, as well as a visual photo, will be a great help to you in this exciting process.
Material selection
In the manufacture of a chandelier, it is difficult to single out any one material that would meet all the requirements. Each of them has its own individual characteristics and features. For example, paper, which is the most simple and affordable material, lends itself well to transformation.
Lamps made of glass fragments and strips of metal have a dazzling brilliance and a beautiful appearance. Wood and fabric add warmth and comfort to the interior. Lace lampshades are distinguished by their special beauty, captivating everyone at first sight.
In a word, you can make a chandelier with your own hands from anything, the main thing is to be smart in time and turn on your imagination.


A paper napkin chandelier is a bold enough but justified experiment.
We will describe in detail in this article how in an ordinary object you can see its creative potential for creating an exclusive decor element.
Step-by-step instructions, with a description of each action, will help you make incredibly beautiful and unique lamps from improvised means that will be a great addition to your favorite interior.
What you need to pay attention to before making a chandelier
Many are interested in how to properly make a chandelier in, and other rooms. After all, I want this element of the interior to be not only beautiful, but also functional.
On the one hand, a chandelier is a lighting fixture that can provide the proper level of lighting in an apartment. After all, a lot depends on the choice of light in the room, including the safety of the eyes. On the other hand, I want the ceiling structure to complement the interior design, creating a special atmosphere of warmth and comfort.
When making a chandelier, the first thing to consider is the height of the ceiling. For example, a chandelier with a bar mount is suitable for low ones. So, the ceiling will look visually higher. If the ceilings are high - 3 m and above, then it is better to make your choice in favor of a pendant lamp with a hook mount.


Lamp selection
For any room you need to individually approach the intensity of its lighting.
For a small bathroom, 80-100 watts will be required.
Kitchens need a lamp power of at least 120-150 watts.
The living room and the hall cannot do without light bulbs in the range of 150-300 watts.
The number and power of lamps is calculated based on established standards - 20 watts are required per 1 m². electricity. It is also necessary to take into account the parameters of the room, its dimensions and reflective properties.

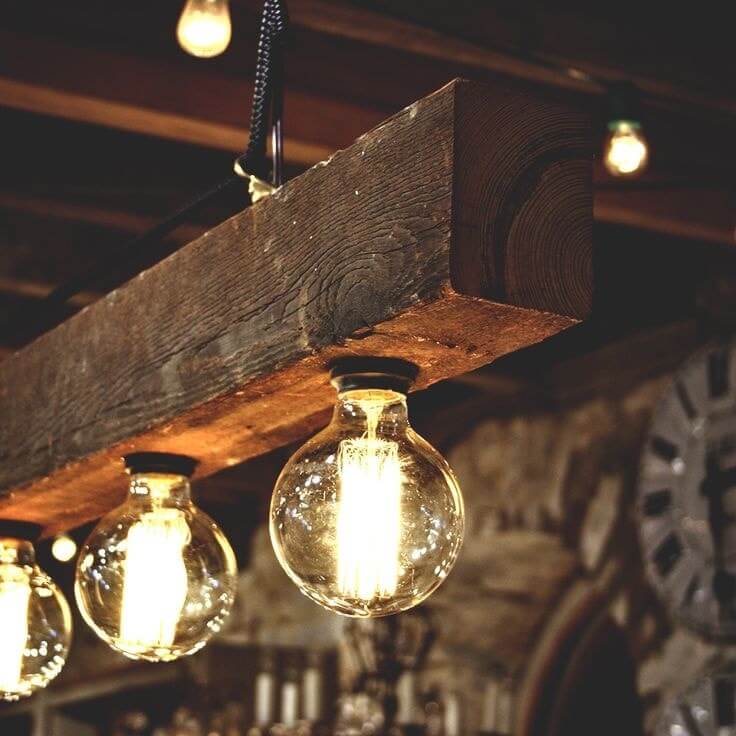
Edison designer lamps - look beautiful and unusual
Plafond design
The appearance, decor and design of the ceiling occupies an important place in the design of the chandelier. It is selected for the interior of the room, depending on the style. Crystal for classics, metal and glass for, wood will fit perfectly into country or chalet style, fabric and silk will perfectly suit Provence style.
To illuminate a room on several levels, you can additionally make wall sconces or floor lamps.


Step-by-step master class on making
To make a beautiful ceiling decoration, it is not necessary to start everything from scratch. Take a look around, you probably have something in your house that you have not used for a long time. And who knows, maybe it will become the main subject in the manufacture of the original lamp. Moreover, there are more than enough ideas and inspiration for creativity on the Internet.
Important! It is best to start searching for the necessary things from the kitchen or balcony. It is there that we store all sorts of rubbish that was once so necessary for us and which, as often happens, is so difficult to part with later.
Spectacular chandelier from mugs
No matter how strange it may sound, it is from dishes and other kitchen utensils that the most unusual and interesting models of lamps are obtained. For example, tea mugs are an ideal material for making a spectacular lamp.
For work we need:
- Mugs
- Saucers
- Drill
- Porcelain drill with special hole

Mastering quickly and easily
- At the bottom of the mug, with a drill, we make a small hole for the wire, fasten the electric chuck and bring the wire out. It is desirable to seal the hole with a gypsum mixture.
- Next, the mug must be glued to the saucer, where there should also be a hole, insert a light bulb and hang the newly made lamp in the right place.
As you can see, original and fashionable design can be obtained from completely ordinary items.


Fascinating yarn chandelier
Since this is a fairly simple product, for its manufacture we need a minimum of things, namely:
- Wire with a section of 4-5 mm.
- wire cutters
- Fine thread
- colorful yarn
Manufacturing instructions:
- A ring is made of wire, the diameter of which will correspond to the future size of our chandelier. To get a perfectly even circle, it can be wound on some object that has a cylindrical shape.
- We bite off the excess wire with wire cutters, leaving 2-3 cm in reserve on each side. We tie the ends with a thin thread.
- It remains to decorate our chandelier beautifully and brightly. To do this, we cut the threads of yarn in such a way that the length of each segment is twice the height of the ceiling.
- Alternately, on a knot, we tie the resulting threads until we hang the whole ring with them. From the same yarn, we make a hook mount.
You can use such a lampshade both in the form of a chandelier and as a decorative element that adorns the interior of the room.


By combining the skills of macrame and papier-mâché, you can get a stylish chandelier for the bedroom
Important! To make such a lamp, instead of woolen yarn, you can use any other thread. The main thing is that it harmoniously fits your interior.
Unusual teapot lamp
You will learn how to make a chandelier from an ordinary teapot yourself from this master class. Here's what we need for this man-made masterpiece:
- Kettle
- The wire
- Electrochuck
- metal chain
Step by step guide to making
- First of all, the bottom of the teapot is cut out. This is done in such a way that the resulting cutting edge is not sharp, otherwise you can get hurt on it.
- Next, an electric cartridge is fixed to the lid of the kettle, the wire of which is led out through a small hole drilled at the top.
- A chain is attached to the handle of the kettle, through the links of which a wire is threaded. The lamp is ready.


Breathe new life into bottles
Glass bottles, especially if they have beautiful shapes, can be used to make a wonderful chandelier. Required material:
- thin rope
- Flammable liquid (alcohol or gasoline)
- Glass bottles (preferably colored)
- Edison lamps (having a beautiful spiral)
- Wire and electric socket
Do it yourself
- We wind the rope on the bottom of the bottle, after wetting it in a flammable liquid. Then we set fire to it and let it break, and we begin to slowly rotate the bottle around its axis until the rope burns to the end. After that, we lower the bottle into a container with cold water, wrap it with a towel and, with a little effort, break off the bottom.
- So that the cut edge is not sharp, it must be sanded. To do this, it will be enough to twist the bottle in sand or small gravel for a couple of minutes.
- It remains to properly mount the electric cartridge, stick the wire through the neck, screw in the light bulb. From the remaining bottles, the rest of the shades are made in a similar way.
This chandelier will perfectly fit into the interior made in any, especially if you hang it over the bar counter.


Can decor
No less beautiful are lamps made from cans. They are made in the same way as from bottles. The only difference is that the bottom of the jar does not need to be cut off, as clear glass is usually used for shades.
We need:
- Beautiful thick-walled jars (preferably with a relief pattern)
- Hammer and nails
- Wire, electric chuck
- Paint can
- Edison lamp
How to do it right
- To begin with, using a nail and a hammer, holes are stuffed in a circle in the lid, after which the inside is gently squeezed out. The diameter of the circle must match the diameter of the socket in the chuck.
- We insert the cartridge into the cover, mount the wire.
- Next, paint the lid along with the cartridge in the color we have chosen. Metallic paint with a golden tint will look best.
- It remains to screw the light bulb, close the lid and install the lamp in its place.


We all know what a globe is, but not everyone knows what amazing things can be done from it. For example - a nice lampshade for a chandelier that will perfectly fit into the interior of a children's room.
Here is everything we need:
- globe
- Bulb
- Electric chuck with holding element
Step by step master class
- Usually the design of the globe is not solid, so in order for us to get the desired element, we need to divide it into equal two parts (hemispheres).
- Next, at the top of the hemisphere, you need to make a hole for the cartridge. For this, it is best to use a drill with a crown.
- The electric chuck is put into place and securely fixed by the retaining element. Congratulations, your chandelier is ready!


Suspended antler structure
Making a unique lighting device from deer antlers is quite simple, the main thing is to have the necessary material at hand.
Such designs are famous for their special sophisticated look and are best suited for rooms with high. Such chandeliers are used in many interiors, but they look especially attractive in country, chalet or rustic style.
As a rule, the shades of such chandeliers have various shapes, and only natural material is used for their manufacture.
We will need:
- Antler
- Rope
- Copper wire
- Electric chuck and wire
- Bulb
Make a chandelier like this
- Observing the precautionary rules, according to the diagram, we connect the wire to the electric cartridge.
- Next, the wire must be beautifully wrapped with a decorative rope. For better fixation, you can use a universal transparent glue.
- With the help of copper wire, horns are attached to the lower part of the resulting rope, placing them 2 cm above the cartridge.
- We repeat a similar procedure with the rest of the shades, then combining them into a single composition.


Ideas for making beautiful lamps (photo, video)
We hope that the useful tips and photos presented in the article will help you not only make beautiful ceiling lamps for chandeliers with your own hands, but also save the family budget.
When there is a desire to change the situation in the apartment and add a little originality to it, start with the little things. Try to change the lampshade, and you will be surprised at the transformation of your family nest.
And if you manage to find an original model that differs from analogues, then the changes will impress not only you, but also your guests.

True, unique lampshades cost decent money, because you can’t get piece work by eminent masters for a penny.

But after all, no one bothers you to create your own unique masterpiece from cheap, and sometimes even junk materials, which will look much better than the samples presented in the store.

All you need is simple materials, a little patience and a flight of fancy, and we will tell you how to make a lampshade with your own hands.
materials
You can create a masterpiece from everything that you have at hand: fabric, paper, thread, twine, wire, plastic bottle, beads or beads.

In general, absolutely everything is suitable, even what you usually send in a garbage bag.

Don't believe? Just look at the photo of the lampshade.

frame
If you have a frame from an old lampshade, then this is just wonderful.

However, do not be upset if one is not found, because you can create a frame yourself from ordinary wire.

Copper, aluminum, steel - everything that you can independently combine into a single structure will do.

The metal frame of the classic lampshade consists of three rings and six jumpers between them. The small ring is a holder, which is connected by three jumpers to a ring of a larger diameter.

The same, in turn, is connected by jumpers to the last ring. The following photos will help you understand the design.
From fabric
When a lampshade frame is available, the easiest way to create your own masterpiece is to wrap the base with a cloth. For this you will need:
- paper (newspaper);
- scissors;
- the cloth;
- chalk or pencil;
- threads.

Wrap the frame with newspaper in such a way as to form a pattern out of it. Then transfer the resulting shape to the fabric with chalk, adding 1 cm on each side to the seam.

Make a pattern, chop off the edges and sew the sides, forming a cover for the base of the future lampshade. We bend the upper and lower edges of the "cover" in such a way as to close the rings of the frame and fix it with a seam.

Note!
Voila, your lampshade for the floor lamp is almost ready. It remains to add a few highlights to your taste, giving it originality.
From threads
How to make a lampshade when there is no frame? Easy peasy.

Take a balloon without drawings, glue, thread, marker and start creating.

First you need to inflate the balloon and mark on it the upper and lower borders of your future masterpiece. Then take the threads and wrap them around the ball, trying not to protrude beyond the marked contours.

Apply glue diluted 1:1 with water to each layer of thread. When the density of the wound thread satisfies you, fix the cut edge and hang the ball to dry. After 3-4 hours, the threads will dry. Then pierce the ball and carefully detach it from the walls of the finished lampshade.

Leaves and flower petals woven between the layers of threads can give additional charm to a lampshade made of threads.
Note!

The ball, decorated with sparkling droplets of beads, also looks original. In general, watch and be inspired.
From paper
Ordinary sheets of office paper, glossy magazines, a cheap newspaper, an unnecessary book or an ordinary notebook, a paper towel or a napkin - these are all future lampshades.

It doesn’t matter if there is a frame or not, the main thing is that there are scissors, glue and paper. A thousand and one versions of such lampshades can be described with the words “cut and stick”.

The main thing is not to forget a few simple rules:
- a paper lampshade is safest to use with economy light bulbs, which heat up much less than incandescent bulbs;
- the diameter of the lampshade for lamps should be large so that the paper does not get too hot;
- for a bright room, you can make a lampshade from thick paper, but for a dark one, you need a thin, well-transmitting light;
- be careful with color. For example, red or yellow paper will add warmth to the room, green and blue - cold.

Well, that's all. Charge with new ideas, arm yourself with improvised means and forward to easy changes that bring warmth and comfort to your home.

Note!
DIY lampshade photo


Decorating the house on your own is a favorite pastime of many hostesses, this article reveals how to make a lamp with your own hands. You can revive the interior of a living room, bedroom or hallway with the help of improvised means, only by changing the ceiling of a chandelier, floor lamp or table lamp. Do-it-yourself lampshades for lamps can be used not only in a residential interior, but also in the halls of cafes, pubs, pizzerias.
The choice of materials and lamps for the lamp
Products made for children's rooms should be made from natural non-toxic materials and painted with ecological paints.

When manufacturing, fire safety should also be taken into account, therefore lampshades made of combustible materials made of paper, plastic, feathers or threads should only be used with lamps that have a low heating temperature.

You need to use LED or fluorescent lamps. They have a number of advantages:
- long service life;
- minimum heating of the base from the glass part;
- light has three shades: warm, cold, neutral.
In addition, such lamps are also called energy-saving, their only drawback is their high cost.

It is also desirable that the connection of the wire to the base be made by a specialist. Do not try to perform this operation yourself, as this may lead to undesirable consequences. It is more convenient to decorate an existing ceiling frame or make it from durable and not very heavy materials.

The following materials are used to create fixtures: scissors, a mounting knife, fishing line, wire, pliers, a hot gun, in some cases it can be replaced with super glue. They should be used by an adult, it is unacceptable to involve a child in gluing. Since in one case he will get a burn, and in the other he can glue his fingers or stick to the details of the future product.
What can you make a plafond from?
Many craftsmen make lamps from completely unnecessary materials:
- from plastic or glass bottles;
- newspapers, thin or colored paper;
- artificial or natural threads;
- dried branches of an unusual shape;
- disposable spoons;
- old disks.

plastic lamp
From plastic containers of different sizes, a homemade chandelier is easily obtained.
- For the base, you need to take a bottle of 5 liters. The bottom is cut off. Then circles with a diameter of 1.5 cm are drawn on the surface. They must be cut with a mounting knife or small scissors.
- The bottom is cut off from the bottles for decor and the entire surface is cut with scissors into strips 0.5 - 1 cm wide, then the workpiece is heated over the lit burner. Under the influence of heat, the stripes will take on a chaotic appearance.
- Then blanks are inserted into a 5-liter container with holes, and lids are screwed on the inside. Then a wire is threaded through the large neck and a ceiling is installed. For such a ceiling, you need to use an energy-saving lamp.
- In some interiors, you can find a fancy lamp made on the basis of an ordinary hanger or a straw hat. In general, nothing can limit the scope of the imagination of both home craftsmen and professional designers.
Plafond from glass bottles
A very interesting version of a homemade chandelier is obtained from glass bottles. They are used to decorate the halls of catering establishments. It is also a good option for a kitchen in a residential building or apartment. This can be a ceiling, consisting of one or more bottles, in which the bottom is cut off. You can do this yourself, but it is better to use the services of a workshop where glass and mirrors are cut.

How to use thread
For a lampshade made of threads or ribbons, you will need: a ready-made frame made of strong wire, threads of different colors, scissors, glue.
- The frame consists of two rings interconnected by metal segments. It can be made independently from durable wire.
- One color or several shades of thread is required.
- A thread is fixed on the lower part, then it must be pulled through the upper ring, lowered down and thrown over the lower ring. It is necessary to ensure that the thread is taut and the coils fit snugly together. As soon as the thread ends, you need to attach the next segment to the lower ring.
- Carefully cut off the rest of the threads and glue them on the back.

Spoons for the lamp
You can make a multi-tiered, colored lamp from ordinary disposable spoons.
- It is necessary to make a wire frame, for a small round lamp you need to make three circles with a diameter of 12, 18, 26 cm. Then the circles are fastened together with a fishing line. The largest diameter will be at the top, there should be the same distance between them.
- In spoons, you need to make a small hole with a thick needle at the top of the handle.
- Spoons are painted with acrylic paints in three colors, for example, yellow, orange, red.
- Assembling a homemade chandelier: the fishing line is cut into a length equal to the distance between the circles. A spoon is tied to one end of the fishing line, and the other to the frame. Yellow spoons should be tied to the lower circle of small diameter, orange to the middle one, and red to the top one.

Lightweight and sleek shade
For a paper ceiling, paper or thin cardboard is suitable. Such a ceiling can be either rectangular or square. First you need to consider the size of the ceiling, the larger the room, the wider the design can be. In a small nursery or hallway, a ceiling with a diameter of 30 - 35 centimeters will look good.

The frame can be made of wire, it will consist of an upper and lower part, consider the manufacture of a cylinder-shaped ceiling.
- It is necessary to make two circles of wire of the desired diameter. They are interconnected with a fishing line, the distance between the lower and upper frame is 12 - 15 cm, the hoops are fastened with a fishing line in three or four places. The larger the diameter of the base, the more connecting elements must be made.
- On a paper blank, you can draw circles of different diameters, figures of cartoon characters. Outline drawings can be taken from the Internet and printed, then redrawn with carbon paper. A special ruler is suitable for drawing circles, or you can outline caps or buttons of different diameters. Some drawings are cut out completely with a clerical knife, some are cut along the contour.
- The paper is tried on the base and glued with an overlap. Then glued to the wire, can also be fixed with a thin wire. To do this, first make a hole in the paper with a thick needle or awl, then thread the wire and carefully tie it to the frame. It is advisable to glue thin paper, as it is easy to ruin it.

Exclusive ceiling made of metal cans
- Basins made of any metal are used, an interesting option will be obtained from copper or aluminum containers. An old, used basin will also work. If there is a through hole in it, it must be welded or sealed, for example, with epoxy.
- The inner surface must be painted in a light color so that the light reflects from it as much as possible.
- The outer surface can be painted in a dark, saturated color, in harmony with the interior.
- A fringe about 5 centimeters long is glued to the bottom of the rim with hot glue. In the central part of the basin, it is necessary to make a hole for the wire. It can be drilled with a drill or pierced with a nail.
Such a ceiling can be decorated with a mosaic of CDs. To do this, the disks are cut with sharp scissors into small fragments, which are glued to the outer surface of the pelvis. You can glue only the bottom contour, and paint the rest. Or decorate the entire surface of the ceiling with such a mosaic. The more convex the surface, the smaller the disk fragments should be.

natural materials
The original lamp can be made from a dry branch of an unusual shape. It must be cleaned of bark and covered with stain, then, if desired, treated with transparent varnish. The branch must be attached to a hook on the ceiling with a regular fishing line. Then I wind the wire with the lamp several times onto the branch. A branch entwined with several wires looks beautiful.

You can make a lamp out of plastic hangers. Detailed in the video:
Lamps in different rooms
DIY bottle chandeliers are more suitable for the kitchen. Designs made of glass or plastic will be easy to clean from dust and wash if necessary. For the kitchen, hallway or living room, a lamp made of natural wood is suitable.

For a children's room, a ceiling made of painted plastic bottles, a floor lamp made of bright threads or a paper composition is more suitable. The latter option cannot be called durable, but this option will appeal to children. Girls will like the plafond with butterflies, plant elements, boys will like designs with cars, superheroes or bright plastic plafonds.

In some cafes, pubs, original lamps made from bottles are used to decorate the hall. It could be beer bottles. They can serve as both a lamp shade and an interesting frame for a lamp.

Ideas for homemade lamps by location
With your own hands, you can give a new look to the floor lamp. You can decorate the ceiling with fabric, threads, paper with cut-out patterns, and you also do not need to ignore the base and leg of the lamp. They can be painted with acrylics, glazed, decorated with beads. The decor of the lower part of the floor lamp should overlap with the elements in the upper part. The easiest option is to decorate the ceiling of a solid color with lace or guipure.


Decoration of lamps
The lower part of the plafond of threads can be decorated with pompoms of the same size hanging on a thread. They are glued on the inside of the frame with glue. Pompoms can hang at the same or at different heights. They can be made in one color or combined in several shades.
To decorate paper lamps, you can use lace, thick tulle, beads of different sizes. You can decorate glass jars or bottles with glass pebbles, which can be purchased at hardware stores. You can also use buttons of different sizes and colors. Small buttons can be glued even on PVA.

On New Year's holidays, it is customary to decorate the Christmas tree, but you can also decorate the shades of lamps, floor lamps. Here you can use the usual rain, do-it-yourself snowflakes, Christmas tree figurines, decorative balls and an ordinary garland. If an energy-saving lamp is installed in a wall or floor lamp, then its ceiling can be decorated with paper snowflakes.

Wall sconces are installed in living rooms, bedrooms, children's rooms. After repair, you can use old sconces only by changing their appearance. You can paint the body of the lamp in a light color, and apply bronze or silver paint on top with a hard bristle brush to create a patina effect. If the ceiling is glass, the pattern you like is applied to its surface using a glass stencil. Here you can use contour (they are used to create a stained-glass window) or spray paints.
There is no doubt that the right lighting in the kitchen sets the tone for the whole interior. A chandelier can become a central element in this cozy and warm room.
Using improvised materials - or even junk - you can make a lampshade from threads, an eco-style lamp from jute twine or plastic bottles, or you can make a real masterpiece - a beautiful chandelier from wooden or glass beads.
And you can not only hang a lamp made by yourself in the kitchen or in the dining area, but also give it to your loved ones.
Method 1. From improvised materials - everyone can!
The simplest do-it-yourself lamp is made of threads. Indeed, even a child can handle such a design. So, to make a chandelier of threads, we need:

- Threads - you can take ordinary jute twine or thick cotton threads, with a total length of at least 100 meters, the color is chosen based on your imagination and the existing interior;
- PVA glue and a brush for its application;
- Petrolatum;
- 2 balloons - one for work, the second for testing; it is better to take a ball not ordinary, but round, then the shape of the lamp will be the correct shape.
Advice! A children's or rubber beach ball is also suitable. For very large fixtures, a fitball is suitable, for example.
Work on creating a ball of threads is carried out in the following sequence:
- We inflate the balloon of the required size. Do not forget that the resulting lampshade made of threads will repeat the shape of the ball. Draw with a marker one or two circles at the top and bottom (more below).
- Pour the glue into a container and carefully process the threads. And the ball itself can be coated with Vaseline with a brush.
Advice! Do not immediately apply glue to all the threads - it is better to move along the place of winding.
- This is followed by winding the threads on the ball, taking into account the drawn holes - it depends on the density of the winding how your lampshade will turn out in the end.

- After the ball is wrapped, you need to leave the future chandelier to dry for at least 24 hours.
- The ball bursts and its remains are easily removed from the solid structure that has become. As a result, a lampshade made of solid threads was obtained.
- A hole is cut from above - under the cartridge.
- It is necessary to check the strength - another ball is inserted into the lamp and inflated. This will demonstrate the flexibility of the design.
In this way, you can also perform local lighting in the kitchen by creating several lamps from threads with your own hands. And you can hang it in the dining area, as shown in the photo.


Do not forget that for a ball of threads you can make additional decor in the form of interesting coloring, beads, butterflies or artificial flowers, or you can make a whole bunch of balls of different sizes.

By the same principle, you can come up with your own unique lamp design. For example, from lace, or a ceiling lamp as in the photo below.


Method 2. Create a masterpiece - you need to try!
Excellent kitchen lighting will turn out if you make a lamp of beads or fabric with your own hands. Get a lamp in style or a real chandelier-chandelier.
For this job you will need:
- Old hoop, garden basket, hanging metal planter, or wire to create a frame;
- Decorative chains;
- Beads, beads, ribbons, strong threads;
- Cartridge with a lamp.


The lamp will be a two- or three-level structure of rings located one above the other and connected by chains or wire.
Rings can be taken in different sizes, creating a lampshade in the spirit of vintage classics, or the same - this is the lighting that is done in.


The base of the lamp is certainly painted, wrapped or decorated, after which they start stringing beads.

The consumption of beads in this project is as follows:
Lower part: beads with a diameter of 16 mm, 15 pcs. on a thread;
Upper part: beads with a diameter of 12 mm, 31-32 pcs. on a thread.
Here you can vary the degree of tension and the number of threads.
Advice! Work should be carried out by first hanging the chandelier and inserting a cartridge into it.
By analogy, you can create a chandelier made of artificial fruits for the kitchen. And subdued lighting will turn out if you use fabric for covering the frame. As a rule, such a lampshade is made for country styles and.
Method 3. Lamps made from waste materials - for a modern kitchen!
The most original lamp can be made from such waste material as plastic bottles and disposable spoons - it's beautiful, cheap and environmentally friendly!
We make a lampshade in the style of minimalism and - no additional decorations from threads and beads, only matte white or colored plastic. To make such subdued kitchen lighting with your own hands, we need:
- Base made from a 5 liter plastic bottle;
- Cartridge with wire and lamp;
- Glue for high-quality fixation;
- Lots of disposable spoons.
To make a chandelier with your own hands, cut out the bottom of the bottle and cut off the handles of the spoons (not completely, so that a small stalk remains). Using glue, we fix the cut spoons on the base bottle. They need to be placed evenly, in order, then the lampshade will look attractive.
Advice! Each next row is overlapped, without gaps.
The resulting chandelier will resemble fish scales. However, it should be remembered that such a design is quite dense, which means that additional lighting will definitely be needed in the kitchen.
The shape of the lamp can be different, for example, in the form of a lotus.

From disposable spoons you can make such decorations.

A lamp made of plastic bottles, or rather from their bottoms, made by hand, may seem lacy or consisting of many small flowers.

Advice! Such a lampshade can be made not white, but colored - which means that you need to take colored bottles or paint it with paint of the original color: copper, gold, steel, pink, black, etc.
The resulting lampshade can be hung in the kitchen or over the dining table.
Let your kitchen be cozy and bright! We wish you creative success and present some more great ideas for making kitchen lamps with your own hands from improvised means.