Every year people are looking for alternative sources. A homemade power plant from an old car generator will come in handy in remote areas where there is no connection to the public network. It will be able to freely charge batteries, as well as ensure the operation of several household appliances and lighting. You decide where to use the energy, what will be generated, and also collect it with your own hands or purchase it from manufacturers, of which there are plenty on the market. In this article, we will help you figure out how to assemble a wind turbine with your own hands from the materials that any owner always has.
Consider the principle of operation of a wind power plant. Under a fast wind flow, the rotor and screws are activated, after which the main shaft starts to move, rotating the gearbox, and then generation occurs. As a result, we get electricity. Therefore, the higher the rotation speed of the mechanism, the greater the productivity. Accordingly, when locating structures, take into account the terrain, relief, and know the areas of the territories where the vortex speed is high.


Assembly instructions from a car generator
To do this, you will need to prepare all the components in advance. The most important element is the generator. It is best to take a tractor or bus, it is able to generate much more energy. But if this is not possible, then it is more likely to get by with weaker units. To assemble the device you will need:
voltmeter
battery charging relay
blade steel
12 volt battery
wire box
4 bolts with nuts and washers
clamps for fastening
Assembling a device for a 220v home
When everything you need is ready, proceed to the assembly. Each of the options may have additional details, but they are clearly specified directly in the manual.
First of all, assemble the wind wheel - the main structural element, because it is this part that will transform wind energy into mechanical energy. It is best that it has 4 blades. Remember that the smaller their number, the more mechanical vibration and the more difficult it will be to balance it. They are made from sheet steel or an iron barrel. They should wear a uniform not the same as you saw in the old mills, but reminiscent of the winged type. They have much lower aerodynamic drag and higher efficiency. After you use a grinder to cut out a windmill with blades with a diameter of 1.2-1.8 meters, you need to attach it, together with the rotor, to the generator axis by drilling holes and connecting with bolts.


Electrical circuit assembly
We fix the wires and connect them directly to the battery and voltage converter. It is required to use everything that at school in physics lessons you were taught to make when assembling an electrical circuit. Before starting development, think about what kW you need. It is important to note that without subsequent alteration and rewinding of the stator, they are not at all suitable, the operating speed is 1.2 thousand-6 thousand rpm, and this is not enough for energy production. It is for this reason that it is required to get rid of the excitation coil. To raise the voltage level, rewind the stator with thin wire. As a rule, the resulting power will be at 10 m / s 150-300 watts. After assembly, the rotor will magnetize well, as if power was connected to it.


Rotary home-made wind generators are very reliable in operation and economically profitable, their only imperfection is the fear of strong gusts of wind. The principle of operation is simple - a whirlwind through the blades makes the mechanism spin. In the process of these intense rotations, energy is generated, the voltage you need. Such a power plant is a very good way to provide electricity to a small house, of course, its power will not be enough to pump water out of a well, but it is possible to watch TV or turn on the lights in all rooms with its help.
From a home fan
The fan itself may not be in working condition, but only a few parts are required from it - this is the stand and the screw itself. For the design, you need a small stepper motor soldered with a diode bridge so that it gives out constant voltage, a shampoo bottle, a plastic water tube about 50 cm long, a plug for it and a lid from a plastic bucket.


A sleeve is made on the machine and fixed in the connector from the wings of the disassembled fan. The generator will be attached to this sleeve. After fixing, you need to do the manufacture of the case. Cut off with a machine or in manual mode the bottom of a bottle of shampoo. During cutting, it is also required to leave a hole at 10 in order to insert an axis machined from an aluminum rod into it. Attach it with a bolt and nut to the bottle. After all the wires have been soldered, another hole is made in the body of the bottle to output these same wires. We stretch them and fix them in a bottle on top of the generator. They must match in shape and the bottle body must reliably hide all its parts.
Shank for our device
In order for it to catch wind currents from different directions in the future, assemble the shank using a pre-prepared tube. The tail section will be attached with a screw-on shampoo cap. A hole is also made in it and, after putting a plug on one end of the tube, they pull it out and fix it to the main body of the bottle. On the other hand, the tube is sawn through with a hacksaw and the shank wing is cut out with scissors from the lid of a plastic bucket, it should have a round shape. All you need to do is simply cut off the edges of the bucket that attached it to the main container.


We attach a USB output to the back panel of the stand and put all the received parts into one. It will be possible to mount the radio or recharge the phone through this built-in USB port. Of course, it does not have strong power from a household fan, but it can still provide lighting for one light bulb.
DIY wind generator from a stepper motor
A device from a stepper motor, even at a low rotation speed, produces about 3 watts. The voltage can rise above 12 V, and this allows you to charge a small battery. As a generator, you can insert a stepper motor from the printer. In this mode, an alternating current is generated from the stepper motor, and it can be easily converted to direct current using several diode bridges and capacitors. You can assemble the scheme yourself. The stabilizer is installed behind the bridges, as a result we get a constant output voltage. To control visual tension, you can install an LED. In order to reduce the loss of 220 V, Schottky diodes are used to rectify it.


The blades will be made of PVC pipe. The workpiece is drawn on the pipe, and then cut out with a cutting disc. The span of the screw should be about 50 cm, and the width should be 10 cm. It is necessary to machine a sleeve with a flange to fit the size of the stepper shaft. It is mounted on the motor shaft and fastened with screws, plastic “screws” will be attached directly to the flanges. Also carry out balancing - pieces of plastic are cut off from the ends of the wings, the angle of inclination is changed by heating and bending. A piece of pipe is inserted into the device itself, to which it is also attached with bolts. As for the electrical board, it is better to place it below, and bring power to it. Up to 6 wires come out of the stepper motor, which correspond to two coils. They will require slip rings to transfer electricity from the moving part. Having connected all the parts together, we proceed to testing the design, which will start revolutions at 1 m / s.
Windmill from a motor-wheel and magnets
Not everyone knows that a wind generator from a motor-wheel can be assembled with your own hands in a short time, the main thing is to stock up on the necessary materials in advance. The Savonius rotor is best suited for it, it can be purchased ready-made or on its own. It consists of two semi-cylindrical blades and an overlap, from which the axes of rotation of the rotor are obtained. Choose the material for their product yourself: wood, fiberglass or PVC pipe, which is the simplest and best option. We make a junction of parts, on which you need to make holes for fastening in accordance with the number of blades. You will need a steel swivel mechanism so that the device can withstand any weather.


From ferrite magnets
A magnetic wind generator will be difficult to master for inexperienced craftsmen, but you can still try. So, there should be four poles, each will contain two ferrite magnets. They will be covered with metal linings a little less than a millimeter thick to distribute a more uniform flow. The main coils should be 6 pieces, wound with a thick wire and should be through each magnet, occupying a space corresponding to the length of the field. The fastening of the winding circuits can be on the hub from the grinder, in the middle of which a pre-turned bolt is installed.
The flow of energy supply is regulated by the height of the stator fixing above the rotor, the higher it is, the less sticking, respectively, the power decreases. For a windmill, you need to weld a support-rack, and fix 4 large blades on the stator disk, which you can cut out of an old metal barrel or a plastic bucket lid. At an average rotation speed, it produces up to about 20 watts.


The design of the windmill on neodymium magnets
If you want to know about the creation, you need to make the base of the car hub with brake discs, such a choice is quite justified, because it is powerful, reliable and well balanced. After you clean the hub of paint and dirt, proceed to the arrangement of neodymium magnets. They will need 20 pieces per disk, the size should be 25x8 millimeters.
Magnets must be placed, taking into account the alternation of the poles, before gluing it is better to create a paper template or draw lines dividing the disk into sectors so as not to confuse the poles. It is very important that they, standing opposite each other, be with different poles, that is, they are attracted. Glue them on with super glue. Raise the borders along the edges of the discs, and wrap tape or plasticine in the center to prevent spreading. In order for the product to work with maximum efficiency, the stator coils must be calculated correctly. An increase in the number of poles leads to an increase in the frequency of the current in the coils, due to this, the device, even at a low speed, gives more power. The coils are wound with thicker wires in order to reduce the resistance in them.
When the main part is ready, the blades are made, as in the previous case, and fixed to the mast, which can be made from an ordinary plastic pipe with a diameter of 160 mm. In the end, our magnetic levitation generator, with a diameter of one and a half meters and six wings, at 8m / s, is capable of providing up to 300 watts.
The price of disappointment or an expensive weather vane
Today, there are many options for how to make a device for converting wind energy, each method is effective in its own way. If you are familiar with the methodology for manufacturing energy-producing equipment, then it will not matter on the basis of what it is made, the main thing is that it meets the intended scheme and gives good power at the output.
I found this detailed design of a Savonius-type rotary wind generator on this wonderful site here http://mirodolie.ru/node/2372 After reading the material, I decided to write about this design and how everything was done.
How it all started
The idea to build a wind turbine originated back in 2005, when a plot was obtained in the family estate of Mirodolie. There was no electricity and everyone solved this problem in their own way, mainly due to solar panels and gas generators. As soon as the house was built, the first thing to think about was lighting, and a 120 watt solar panel was purchased. In the summer it worked well, but in winter its efficiency dropped significantly and on cloudy days it gave a current of only 0.3-0.5A / h, this didn’t suit me at all, since even there was barely enough light, and it was also necessary to power the laptop and other small electronics.Therefore, it was decided to build a wind generator to use wind energy as well. At first there was a desire to build a sailing wind generator. I really liked this type of wind turbines, and after some time spent on the Internet, a lot of materials on these wind generators have accumulated in my head and on my computer. at least five meters.
It was not possible to pull a large wind generator, but still I really wanted to try to make a wind generator, at least of low power, to charge the battery. The horizontal propeller wind generator immediately disappeared because they are noisy, there are difficulties in manufacturing slip rings and protecting the wind generator from strong winds, and it is also difficult to make the right blades.
I wanted something simple and low-speed, after watching some videos on the Internet I really liked Savonius-type vertical wind turbines. In fact, these are analogues of a cut barrel, the halves of which are moved apart in opposite directions. In search of information, I found a more advanced type of these wind turbines - the Ugrinsky rotor. Ordinary Savonius have a very small KIEV (wind energy utilization factor), it is usually only 10-20%, and the Ugrinsky rotor has a higher KIEV due to the use of wind energy reflected from the blades.
Below are illustrative pictures to understand the principle of the robots of this rotor
Scheme for marking the coordinates of the blades
 >
>
KIEV of the Ugrinsky rotor is declared as high as 46%, which means it is not inferior to horizontal wind turbines. Well, practice will show what and how.
Blade manufacturing.
Before starting to manufacture the rotor, we first made models from beer cans of two rotors. One model of the classic Savonius, and the second of Ugrinsky. On the models, it was noticeable that the Ugrinsky rotor works noticeably at higher speeds in comparison with Savonius, and a decision was made in favor of Ugrinsky. It was decided to make a double rotor, one on top of the other with a 90-degree turn in order to achieve a more even torque and a better start.The materials for the rotor are the simplest and cheapest. The blades are made of 0.5mm thick aluminum sheet. Three circles are cut out of 10mm thick plywood. The circles were drawn according to the drawing above and grooves were made 3 mm deep for the insertion of the blades. The fastening of the blades is made on small corners and pulled together with bolts. Additionally, for the strength of the entire assembly, plywood discs are pulled together with studs along the edges and in the center, it turned out to be very rigid and durable.
 >
>
 >
>
The size of the resulting rotor is 75 * 160 cm, about 3,600 rubles were spent on rotor materials.
Generator manufacturing.
Before making the generator, there were many searches for a ready-made generator, but there are almost none of them on sale, and what can be ordered via the Internet cost decent money. Vertical wind generators have low speed and on average for this design about 150-200 rpm. And for such revolutions it is difficult to find something ready and not requiring a multiplier.In search of information on the forums, it turned out that many people make generators themselves and there is nothing complicated about it. The decision was made in favor of a homemade permanent magnet generator. The classic design of an axial generator with permanent magnets, made on a car hub, was taken as a basis.
First of all, neodymium puck magnets for this generator were ordered in the amount of 32 pieces 10 * 30mm in size. While the magnets were being made, other parts of the generator were being made. Having calculated all the dimensions of the stator for the rotor, which is assembled from two brake discs from a VAZ car on the rear wheel hub, coils were wound.
A simple manual machine was made for winding coils. The number of coils is 12, three per phase, since the generator is three-phase. There will be 16 magnets on the rotor discs, this ratio is 4/3 instead of 2/3, so the generator will turn out to be quieter and more powerful.
A simple machine was made for winding coils.
 >
>
The locations of the stator coils are marked on paper.
 >
>
To fill the stator with resin, a plywood mold was made. Before pouring, all the coils were soldered into a star, and the wires were led out through the cut channels.
 >
>
Stator coils before filling.
 >
>
A freshly cast stator, before pouring, a glass mesh circle was laid on the bottom, and after laying the coils and pouring epoxy, a second circle was laid on top of them, this is for additional strength. Talc is added to the resin for strength, which makes it white.
 >
>
The magnets on the disks are also filled with resin.
 >
>
And here is the already assembled generator, the base is also made of plywood.
 >
>
After manufacturing, the generator was immediately twisted by hand for the current-voltage characteristics. A 12 volt motorcycle battery was connected to it. A handle was attached to the generator and looking at the second hand and rotating the generator some data was obtained. On the battery at 120 rpm it turned out 15 volts 3.5A, the strong resistance of the generator does not allow to spin it faster by hand. Maximum idle at 240 rpm 43 volts.
Electronics
 >
>
For the generator, a diode bridge was assembled, which was packed in a case, and two devices were mounted on the case: a voltmeter and an ammeter. Also, a familiar electronics engineer soldered a simple controller for him. The principle of the controller is simple, when the batteries are fully charged, the controller connects an additional load that eats up all the excess energy so that the batteries do not recharge.
The first controller soldered by friends did not quite suit me, so a more reliable software controller was soldered.
Installation of a wind generator.
For the wind generator, a powerful frame was made of wooden bars 10 * 5 cm. For reliability, the support bars were dug into the ground by 50 cm, and the whole structure was additionally reinforced with stretch marks that were tied to the corners driven into the ground. This design is very practical and quickly installed, as well as easier to manufacture than welded. Therefore, it was decided to build from wood, and metal is expensive and there is nowhere to turn on welding yet. >
>
Here is a ready-made wind generator. In this photo, the generator drive is direct, but later a multiplier was made to raise the generator speed.
 >
>
 >
>
The generator is driven by a belt, the gear ratio can be changed by replacing the pulleys.
 >
>
 >
>
 >
>
Subsequently, the generator was connected to the rotor through a multiplier. In general, the wind generator produces 50 watts in a wind of 7-8 m / s, charging starts in a wind of 5 m / s, although it starts to rotate in a wind of 2-3 m / s, but the speed is too low to charge the battery.
In the future, it is planned to raise the wind generator higher and rework some of the installation components, and it is also possible to manufacture a new larger rotor.
Perhaps, not a single summer resident will argue with the fact that today it is necessary to have some kind of alternative source of electricity, because the light can be turned off at any moment. Homemade wind turbines have gained great popularity as a source of free energy today. A variety of models of such devices are offered on the market, and on the Internet you can see diagrams, drawings and videos that allow you to assemble them yourself.
It is worth noting that a homemade wind generator will be very useful even with its low power. The mere fact that in the midst of pitch darkness the cottage will be lit, and it will be possible to watch TV or charge a mobile device without any problems, will insure against troubles and raise prestige in front of neighbors.
Three little secrets
The first secret is at what height the homemade wind generator will be installed. It is clear that it is easier to mount it at a height of several meters from the ground, but then there will not be much sense from it. It should be borne in mind that the higher the wind generator, the stronger the wind, the faster its blades spin, and the more energy you can get from a do-it-yourself power plant.
The second secret is the choice of battery. On the Internet, it is advised not to be smart and install a car battery. Yes, it is easier and, at first glance, cheaper. But, you need to know that car batteries should be installed in a well-ventilated area, they require maintenance, and their service life does not exceed 3 years. It would be better to purchase a special battery. Although it costs more, it will justify itself.
The third secret is which wind generator is better suited for making your own hands - horizontal or vertical? Each option has its own advantages and disadvantages. We will consider vertical type wind turbines, the principle of operation of which is shown in Fig. 2.

First, about the disadvantages: a vertical wind turbine has a low efficiency compared to horizontal models, it takes more materials to assemble it, which, accordingly, leads to an increase in the cost of the structure. On the other hand, they can operate in weaker winds than their horizontal counterparts, which compensates for their low efficiency. They do not need to be lifted too high and are easier and cheaper to assemble and install, which negates the difference in material costs.
An important factor is the fact that a vertical wind generator is more reliable in case of sudden gusts of wind and hurricanes, since its stability increases with increasing rotation speed. In addition, vertical structures are almost silent, which allows them to be installed anywhere, up to the roof of a residential building. All of the above leads to the fact that these units are in growing demand and are produced in various modifications, in relation to the required power and winds prevailing in certain regions, which, by the way, can be found in the video below.
The simplest design
It is not difficult to assemble a low-power vertical wind generator with your own hands from, without exaggeration, waste materials: a large plastic bottle or tin can, a steel axle and an old electric motor. It is enough to cut a jar or bottle in half and fix these halves on the axis of rotation associated with the generator (Fig. 3). It is easy to make such a vertical windmill collapsible and take it with you on a fishing or camping trip, where it will not only illuminate the place to sleep, but also allow you to recharge your phone or other mobile device.

Own power plant for a summer residence
But the manufacture of more will have to start with the purchase of a bucket and this is not a hoax. Yes, for starters, you have to buy an ordinary galvanized bucket. This, of course, in the event that such a leaky bucket was not lying around somewhere in the barn. We mark it into four parts and make cuts with scissors for metal, as shown in Fig. 4.
The bucket is attached to the bottom of the generator pulley. It should be fixed with four bolts, placing them strictly symmetrically and at the same distance from the axis of rotation, which will avoid imbalance.
So, almost everything is ready, it remains to perform the following steps:
- Bend the metal on the slots to get the blades. If a strong wind prevails most often, it is enough to bend the sides slightly. If the wind is weak, you can bend it harder. In any case, the amount of bend can be adjusted later;
- Connect all the necessary devices (except for the generator) as shown in Fig. 5;
- Fix the generator with the wires coming from it on the mast;
- Secure a mast;
- Connect the wires coming from the generator to the controller.

Everything. A hand-made wind generator is ready to go.
Wiring diagram
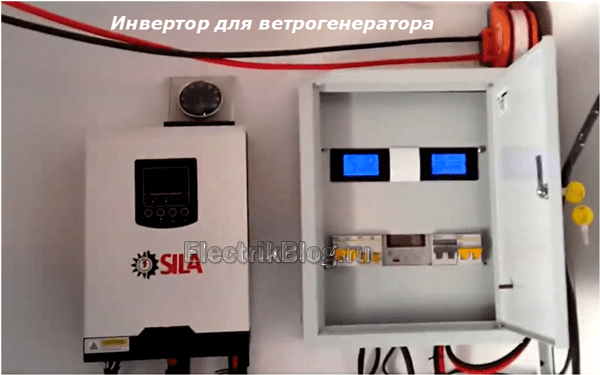
Let's take a closer look at the electrical circuit. It is clear that the wind can stop at any moment. Therefore, wind turbines are not connected directly to household appliances, but first they charge batteries from them, to ensure the safety of which, a charge controller is used. Further, given that batteries provide low voltage direct current, while almost all household appliances consume 220 volt alternating current, a voltage converter or, as it is also called, an inverter is installed and only then all consumers are connected.
In order for the wind generator to ensure the operation of a personal computer, TV, alarm and several energy-saving lamps, it is enough to install a battery with a capacity of 75 ampere / hour, a voltage converter (inverter) with a power of 1.0 kW, plus a generator of the appropriate power. What else do you need when you are relaxing in the country?
Summing up
A vertical wind generator, which can be made according to the instructions above, can operate in fairly light winds and regardless of its direction. Its design is simplified due to the fact that it does not have a weather vane that turns the propeller of a horizontal wind generator downwind.
The main disadvantage of vertical axis wind turbines is low efficiency, but this is redeemed by a number of other advantages:
- Speed and ease of assembly;
- Absence of ultrasonic vibration typical for horizontal wind generators;
- Undemanding to maintenance;
- Sufficiently quiet operation, allowing you to install a vertical windmill almost anywhere.
Of course, a self-made windmill may not be able to withstand an excessively strong wind, which will be able to break the bucket. But this is not a problem, you just have to buy a new one or save the old one that has served its time somewhere in the barn.
In the video below you can see how household appliances are powered in the country. True, the wind generator here is not made from a bucket, but also with their own hands.
The Internet begins to "burst at the seams" from the laudatory articles of the authors, offering everyone to use natural wind energy to get free electricity.
I propose to consider this issue from a practical point of view, to evaluate the economic effect before you start creating a wind turbine for a private house with your own hands or even purchase a factory model.
Let's talk about the difficulties that you will have to face: they must be foreseen and overcome. The topic is complex. It is necessary to evaluate the aerodynamic and mechanical characteristics, to make an electrical calculation.
Industrial wind turbines: a role model
It is no secret that alternative energy really allows you to get electricity literally from the wind. In Europe, industrial wind turbines occupy vast areas and operate autonomously for the benefit of man.
They are huge, located in areas open to all winds, towering over trees and local objects.
And the windmills are installed at a distance from each other. Therefore, accidental breakdowns and damage to one cannot harm neighboring structures.
We will take these principles for creating wind generators as the basis for the development of home-made devices. They are based on scientific research,
already tested for long-term operation, they work effectively.
Let's start with an analysis of the characteristics of the area where we plan to create a wind farm.
How to determine wind speed: is there enough pressure for a household windmill
We will discuss the issue on the basis of scientific facts and the mistakes already made by many owners of private houses
Theoretical part of the project: what to look for when choosing a design
The average annual wind value for any locality in Russia or another country can be found on the wind map. This data is publicly available.

If we consider the entire territory, then there are not so many places for the favorable use of wind energy with a speed of 5 m / s and above, as in Europe.
I explain this situation by the fact that the warm air of the Gulf Stream, rising from the heated water, immediately rushes into cold areas. The higher the temperature difference, the greater its speed.
After passing several thousand kilometers over Europe, his strength weakens. The greatest temperature difference in spring and autumn causes storms and hurricanes.
It is important for us to understand how to determine the wind speed correctly in our area.
Let's take the value of 5 m/s as a basis, and calculate the power of the wind flow for the most common horizontally located axial generator.

We take into account that its blades cover the area of the circle S (m2) with a diameter D (m). A wind passes through it with a speed V (m / s).
Wind energy Pv is calculated by the formula:
ρ is the density of the air mass (kg/m3)
If we take averaged values, for example, an area of 3 square meters and a density
air 1.25 kg / m 3, then the wind blowing at a speed of 5 m / s is able to create a power of slightly less than 2 kilowatts.
Now our task is to determine which part of it can be converted into useful electrical energy. Roughly, it can be estimated by the percentage of 30÷40%. The design and technological characteristics of the wind wheel simply will not allow you to efficiently take more.
A more precise definition is found by a formula that takes into account:
- coefficient ε, which determines the proportion of wind energy used by the design of the windmill. The maximum value created by high-speed structures is 40-50%;
- Reducer efficiency -∙maximum about 90%;
- Generator efficiency ≈85%.
The values of all these coefficients for different models of wind turbine generators are very different from each other. I gave the values for industrial products. For do-it-yourselfers, they will be much lower.
If we substitute all these figures, then even for the factory design of a wind generator, made according to exact drawings and on industrial machines, we can get less than 700 watts of electrical energy at a speed of 5 m / s and a 3 square meter area described by the propeller blades.
What part of it a homemade windmill can take, one can only guess.
World manufacturers of wind turbines indicate that in order to generate 3 kW of electricity, and this is the optimal value for a private house, it is necessary:
- remove about 5.1 kW from the wind wheel;
- have a rotor diameter of 4.5 meters;
- place the windmill at a height of 12 meters;
- use wind with a speed of 10 m/sec.
The wheel should begin to rotate the generator already at 2 m / s. Only in this case can we talk about the payback of the entire structure and the efficient use of wind power.
If the speed decreases, at least to 7 m / s, then the energy of the wind generator will drop by 50%. And now take another look at the map of the winds of Russia...
However, not everything is so bad. Theoretical calculations can be tested in practice. For our case, the sale offers numerous designs of measuring instruments - anemometers.

They are not expensive, they have additional functions for measuring temperature, indicating the current time. They can be ordered from China.
Such an anemometer allows you to realistically assess the strength of the wind in your area in order to analyze the options for operating a future wind farm (WPP). There are at least 2 of them:
- partial satisfaction of electricity needs;
- full transition to alternative energy.
Hidden error - weak wind: what sellers are silent
First difficulty
Pay attention to the height of the wind wheel placement relative to the ground. Think about why all industrial windmills are 25 meters or more.
After all, this greatly complicates their installation, operation, maintenance, repair. We have to use expensive high-rise equipment, create solid platforms for its placement.

And the answer is simple: at a height of 25 meters, the wind speed is much higher than near the ground. All tables and reference books with wind maps are created primarily for industrial installations raised to a zone of 50-70m.
If you mount your homemade wind generator at 10 meters, then the wind will blow weaker than indicated in the manual. And it is very problematic to place a windmill at a great height without special technical means.
The work of the wind wheel is caused not so much by the speed of movement of the air mass as by its pressure on the wheel blades. And it also depends on the weight and density of the atmosphere.
Alternative energy companies have long taken into account the ratio that doubling the pressure of the wind increases the power generated by the wind turbine by eight times.
How does the turbulence zone affect
The operation of a windmill located at a low altitude can be significantly complicated by the turbulence zone, which depends not only on the terrain and the shape of the hill, but also on the speed of movement of air masses.

Wind turbine lightning protection
A working impeller constantly rubs against the air, accumulating static electricity, just like the fuselage of any aircraft during flight. Aircraft designers successfully solve this issue in various ways.
Industrial wind turbines are also equipped with effective protection against lightning, the discharges of which can occur at any time during a thunderstorm period.

Most owners of private houses do not even think about this problem, but in vain. At best, individual owners can be found, which is clearly not enough.

Having raised an iron structure above the roof of their dwelling, which also generates electrical voltage, they have already created an excellent lightning rod. It will reliably attract huge currents of atmospheric discharges.
If you do not provide an effective way to lead them past the building to the potential of the earth, then you will have to constantly tempt fate, expose yourself to unexpected danger.
How do windmill manufacturers lie?
The final tests of factory models are carried out in a wind tunnel with an ideal laminar flow with a uniform structure of its direction and high density.

In real conditions of a private house, such conditions simply do not exist. They are more suitable for the movement of air masses in industrial installations located at high altitudes.
For homemade wind turbines, mounted even at 10 meters, turbulence conditions and light wind can severely limit the spin of the rotor.
The terrain affects the specific power. For example, directly under a hill, it sharply decreases, and ideal conditions are created at its top due to the compression of aerodynamic characteristics and pressure increase.

Outbuildings, garden trees, fences, neighboring buildings will also be affected.
Do-it-yourself windmills for home: an overview of designs
As you already understood, the very first part that perceives wind energy is the wind wheel. Not a single windmill scheme for a house can do without it.
It can be done:
- with a vertical axis of rotation;
- or horizontal.
Vertical wind generator
I will show with a photo one of the easy-to-make structures made from an ordinary steel barrel.

Here is such a vertical wind generator, made by hand, and even located above the ground surrounded by buildings and plants, will not be able to develop normal speed to generate enough electricity to power a private house.
He will be able to perform only some single tasks for low-power equipment. Moreover, the low speed of rotation of its rotor will require the mandatory use of a step-up gearbox, and this is additional energy loss.
Such designs were popular at the beginning of the last century on steamboats. The water wheel, located with its blades along the direction of the vessel, ensured its movement.

Now it is a rarity that has lost its relevance. In aviation, such a design not only did not take root, but was not even considered.
Of the low-speed designs of wind wheels, the Onipko rotor is now massively distributed via the Internet. Advertisers show its rotation even in very light winds.

However, for some reason I also have a critical attitude towards this development, although it is not so difficult to repeat it with my own hands. I did not find rave reviews among buyers, as well as scientific calculations of the economic feasibility of its use.
If one of the readers can dissuade me of this opinion, I would be grateful.
From the very beginning, aircraft engines began to use a screw that drives the air flow along the body of the aircraft. Its shape and design are chosen so as to use a reactive component in addition to the active pressure force.
Any horizontal wind generator, which is made industrially or by hand, works according to this principle. I show an example of a home-made design with a photograph.

According to the principle of using wind energy, this is a more efficient design, and in terms of execution to ensure household issues of supplying electricity, it is low-power.
A small electric motor, the rotor of which spins the windmill, can, even with optimal pressure and wind strength, only work as a generator. You can connect a weak LED light bulb to it.
Think for yourself whether it is necessary to assemble such a weather vane with illumination or not. Such a design will not cope with other tasks. Although it can still be used to scare away moles on the site. They really do not like the noises accompanied by the rotation of metal parts.
In order to fully use the electricity received from the wind, the impeller of the wind generator must have the dimensions corresponding to the power consumption. Count on about five meters in diameter.

When creating it, you will encounter a technical difficulty: you will have to accurately balance large parts. The center of mass must always be at the midpoint of the axis of rotation.
This will minimize bearing wobble and swaying at high elevations. However, this balancing act is not so easy.
How to install a wind turbine: a reliable mast layout for mounting at a height
The weight of the impeller for the normal production of electrical energy is quite decent. It cannot be installed on a simple rack.
It will be necessary to create a solid concrete foundation for a metal mast and guy anchor bolts. Otherwise, the entire structure assembled with great difficulty may collapse at any inopportune moment in time.

A stand for a wind generator raised to a height can be made:
- in the form of a prefabricated mast assembled from sections with braces;
- or conical tubular support.
Both schemes will require anti-tilt reinforcement through the creation of several tiers of guys from cables, which are necessary to hold the mast in heavy gusts of wind. They will have to be securely fastened to the stoppers and anchors.
From personal bad experience: while using analog television, the Spider web antenna with a hoop diameter of 2m worked for me. It was located at a height of 8 meters, was fixed on a wooden pole with two levels of guys. Squally gusts of wind shook it so that the stand collapsed.
Modern digital television, fortunately, requires the use of much smaller antennas. They are not only, but also not so difficult to mount.
How to make a mast for a windmill
Immediately pay attention to the creation of a durable, trouble-free design. Otherwise, just repeat the sad experience of YantarEnergo workers, who had an accident during a storm: a multi-ton mast collapsed, and fragments from the blades scattered throughout the district.

The device of the mast will require the calculation of the amount of materials needed to create a structure from a steel angle of various sections. The shape and dimensions are selected according to local conditions.

It is made of three or four vertical racks. Each of them is mounted on the stop from below. At the top of the mast, a platform is created for installing a windmill.
Since the length of the corners is limited, the mast is assembled from several sections. The rigidity of the overall fastening is given by the side ribs fastened through the braces.
An obligatory element of the foundation are embedded metal elements. They will be used to fasten parts. We'll have to take care of welding and connecting bolts.
Do not neglect additional braces.
How to make a pipe support
It is easier to assemble a telescopic structure from steel pipes of the appropriate profile, but it should be more carefully calculated for strength. The bending moment created by the heavy tip in a storm should not exceed a critical value.
In this case, there will be difficulties with preventive maintenance, inspection and repair of the assembled air power plant. If you can climb the mast to a height like a ladder, then it is problematic to do it through a pipe. Yes, it is very dangerous to work at the top.
Therefore, it is immediately necessary to consider the option of safely lowering the equipment to the ground and an affordable way to raise it. This allows you to perform one of two schemes with:
- Rotary axis on the main support.
- Thrust lever on the bottom of the support column.
In the first case, a solid foundation is created for the installation of the main support. A welded pipe structure with a windmill and a chain hoist system on steel cables is attached to its axis of rotation.

A counterweight is located at the bottom of the pipe, which facilitates the work of lifting and lowering with a hand winch.
The picture does not show the safety cables of the guy belts. They simply hang from their anchors down to the ground as the mast is raised and lowered, and are attached to fixed concrete stakes for permanent operation.
The scheme for installing and lowering the windmill according to the second option is shown below.

The mast and the thrust lever with a counterweight, reinforced with a stiffener, located at right angles to it, are turned in the vertical direction by a winch with a pulley system.
The axis of rotation of the created structure is located at the top of the right angle and is fixed in the guides built into the foundation. When lifting or lowering the mast, the guy wires are removed from the stationary anchorages on the ground. They can be used as safety lines.
Wind generator: device and principle of operation of the electrical circuit in simple words
Industrial wind farms are designed in such a way that they are able to immediately deliver electrical energy to the grid to consumers. You can't do it by hand.
When choosing a generator that will spin the wind wheel, the principle of reversibility of electrical machines is used. A torque is applied to the electric motor and the stator windings are excited.
However, the idea to spin the rotor of a three-phase asynchronous electric motor as a generator to obtain electric current with a voltage of 220/380 volts is realized from internal combustion engines, water pressure, but not wind.
The overall design of the generator with the rotor will become heavy, otherwise it will not be possible to ensure high shaft speeds.
For small capacities, you can:
- use a car generator that produces 12/24 volts;
- use a motor wheel from an electric bike;
- collect
construction of neodymium magnets with copper wire coils.
You can also take a windmill sold in China as a basis. But he needs to immediately conduct an audit: pay attention to the quality of the installation of the windings, the condition of the bearings, the strength of the blades, and the overall balancing of the rotor.
We'll have to tune in to the fact that the generator will vary greatly depending on the wind speed. Therefore, batteries are used as an intermediate link.

Their charging must be assigned to the controller.
Household appliances of the 220 volt network must be from a special converter - an inverter. The simplest scheme of a home wind farm is as follows.

It can be greatly simplified because consumer digital electronics: computers, televisions, telephones are powered by DC power supplies of 12 volts.
If they are excluded from operation and digital equipment is powered directly from batteries, then the loss of electrical energy will be reduced by canceling double conversion in the inverter and blocks.
Inside the electrical circuit, you will have to observe the same power balance as in the mechanical design. Each connected load must match the power rating of the upstream source.
220 volt household appliances should not overload the inverter. Otherwise, it will be disconnected from the built-in protection, and if it fails, it will simply burn out. Batteries, power contacts of the controller, and the generator itself work on the same principle.
Protecting the domestic wind turbine with a circuit breaker must be carried out without fail.

To do this, it needs to be checked and adjusted.

Accidental overload, and even more so the appearance of a short circuit current, cannot be foreseen. Therefore, this module must be installed as the main protection.
The scheme for connecting batteries, an inverter and a controller for a wind generator is practically no different from that used at solar stations with light panels.
Therefore, a reasonable conclusion immediately suggests itself: to assemble a combined home power plant that runs on wind and solar energy at the same time. These two sources together complement each other well, and the cost of assembling single stations is greatly reduced.
There are a lot of channels on YouTube dedicated to wind turbines for the home. I liked the work of the owner of Solar Batteries. I think that he is quite objective in his presentation of this topic. Therefore, I recommend that you take a closer look.
Wind turbine batteries: another problem for the home owner
One of the costly tasks of a wind or solar power plant is the issue of storing electrical energy, which only batteries can solve. They will have to be bought and updated, and the cost is quite high.
To select them, you need to know the operating characteristics: voltage and capacitance. Usually, composite batteries from a 12 V battery are used, and the number of ampere-hours in each case should be determined empirically, based on the power of consumers and their operating time.
You will have to choose batteries for a wind generator from a fairly wide range. I will limit myself not to a complete review, but only to four
popular types of acid batteries:
- conventional starter automobiles;
- AGM type;
- gel;
- armored.
- when stored in frost, they must withstand the huge starter currents that are created during the spin-up of a cold engine;
- while driving are subjected to vibrations and shaking;
- recharging occurs in buffer mode from the generator
when driving a car with different engine speeds.
Wherein:
- serviced batteries that require periodic electrolyte levels and topping up with distilled water are designed to withstand 100 discharge / charge cycles;
- not serviced - have a more complex design and the number of cycles is 200.

However, the battery of the wind generator when operating inside the house:
- usually placed in the basement, where the temperature, maintained at the level of + 5 ÷ + 10 degrees all year round, is optimal;
- not subject to shaking and vibration, stationary
installed in a stationary state; - they do not receive extreme loads during start-up, and when household appliances are turned on through the inverter, they work in a gentle mode;
- are charged from the generator with small currents, which favorably affect the desulfation mode of the plates.
All this is the most favorable conditions for their operation. Therefore, I propose to take note of this option for those who are not too lazy to periodically monitor the voltage on the banks and monitor the level
electrolyte in them.
More complex in design. They have the same plates, but glass mats are impregnated with acid, working simultaneously as a dielectric layer. Their discharge/charge cycle is 250÷400. Reloading is dangerous.

Assist batteries are also created by a maintenance-free design with a sealed housing and an electrolyte thickened to a gel state. They really dislike overcharging, but are more resistant to deep discharge. Number of settlement cycles -350.

Relate to the most modern developments. Their electrode plates are protected by polymers from acid attack. Operating cycle range: 900÷1500.

All these four types of batteries differ significantly in price and operating conditions. If you take into account the recommendations of the sellers, you will have to pay a pretty decent amount of money.
He has a different opinion on this matter. How you treat him is your own business. However, to know information from opposite sources and choose the most appropriate option from it: the best solution for a thinking person.
How to calculate the economic effect: the price of a wind turbine
One of the marketing moves of sellers are price lists,
showing calculations of customer savings created by purchasing their products. Should they be trusted?
I suggest that you independently evaluate the economic benefits of installing a wind farm on your site. To do this, you need to take into account the minimum cost of money for:
- erecting a foundation for a mast, which will use a lot of concrete and metal reinforcement;
- creating a high-rise support for installation
wind turbines in the zone of favorable wind pressure. This will include not only
metal corners, pipes and fasteners with welding, but also the cost of the entire installation; - purchase price of a finished wind turbine or
its manufacture at home; - purchase of an inverter, controller, batteries, protective modules, cables and wires. Please note that in 10-12 years the battery set will have to be changed several times;
- operating costs for preventive maintenance and repairs;
- solution of a number of organizational issues.
The practice of using wind farms has shown that they do not work quietly, and the constant vibrations and noises of the wind generator annoy the nearest neighbors. Sometimes you have to resolve issues through the courts.
In addition, birds sometimes get into the area of a rotating wheel: plastic blades break, metal ones bend. Requires reliable protection and a spare set of spare parts.
It can even be assumed that everything will work reliably and efficiently for 10 years, although I explained the wind speed in some detail in the very
the beginning of the article.
When you calculate all these costs (adjust for a part of unforeseen expenses), then estimate the price of 1 kilowatt of electricity that you pay on the meter now.
Multiply it by the number of kilowatts for which you create a wind farm, for example by 3. Then it remains to determine the time period for comparison.
Let's take as a basis the time for which you plan to recoup your costs, for example, 15 years of operation. The payment of 3 kW per hour must be multiplied by this period, expressed in hours, and compared with the cost of creating and operating a wind farm for the same period.
The estimate is very approximate, prices fluctuate, but the calculation for my case showed that it is easier to pay for electricity to the state. Costs will be 4 times lower.
I believe that you can create a wind generator for a private house with your own hands. There are many examples of his work. However, it is necessary to think carefully about the feasibility of its use, to justify the economic benefits.
Without an accurate preliminary calculation, the money for its creation can literally be wasted and will not bring any benefit to the owner. If I made a mistake in the forecasts, then correct me in the comments.
Please note that your experience is of interest not only to me, but also to a large number of other people. It will benefit them too.
A wind generator made from a car generator can help in a situation where there is no way to connect to a power line in a private house. Or serve as an auxiliary source of alternative energy. Such a device can be made from improvised materials, using the achievements of craftsmen. Photos and videos will demonstrate the process of creating a homemade wind turbine.
There is a huge species diversity of wind turbines and drawings of their manufacture. But any design includes the following mandatory elements:
- generator;
- blades;
- storage battery;
- mast;
- the electronic unit.
 With some skills, you can make a wind generator with your own hands
 In addition, it is necessary to think over the control and distribution system of electricity in advance, draw an installation diagram.
wind wheel
The blades are perhaps the most important part of a wind turbine. The operation of the remaining components of the device will depend on the design. They are made from different materials. Even from a plastic sewer pipe. Blades from a pipe are easy to manufacture, are cheap and are not affected by moisture. The wind turbine manufacturing process is as follows:
- It is necessary to calculate the length of the blade. The diameter of the pipe should be equal to 1/5 of the total footage. For example, if the blade is meter long, then a pipe with a diameter of 20 cm will do.
- We cut the pipe with a jigsaw along into 4 parts.
- We make a wing from one part, which will serve as a template for cutting subsequent blades.
- We smooth out the burr on the edges with an abrasive.
- The blades are fixed to an aluminum disk with welded strips for fastening.
- Next, the generator is screwed to this disk.
 Blades for wind wheel
 After assembly, the wind wheel needs to be balanced. It is fixed on a tripod horizontally. The operation is carried out in a room closed from the wind. If the balance is correct, the wheel should not move. If the blades rotate themselves, then they need to be sharpened to balance the entire structure.
Only after the successful completion of this procedure, you should proceed to check the accuracy of rotation of the blades, they should spin in the same plane without skew. An error of 2 mm is allowed.
 Generator Assembly Diagram
 Mast
For the manufacture of the mast, an old water pipe with a diameter of at least 15 cm, a length of about 7 m is suitable. If there are buildings within 30 m of the intended installation site, then the height of the structure is adjusted upwards. For efficient operation of the wind turbine, the blade is raised above the obstacle by at least 1 m.
The base of the mast and pegs for fixing the guy wires are concreted. Clamps with bolts are welded to the stakes. For stretch marks, a galvanized 6 mm cable is used.
Advice. The assembled mast has a considerable weight, with manual installation you will need a counterweight from a pipe with a load.
Alteration of the generator
For the manufacture of a windmill generator, a generator from any car is suitable. Their designs are similar to each other, and the alteration comes down to rewinding the stator wire and making the rotor on neodymium magnets. Holes are drilled in the poles of the rotor to fix the magnets. Install them by alternating poles. The rotor is wrapped in paper, and the voids between the magnets are filled with epoxy.
 car alternator
 In the same way, you can remake the engine from an old washing machine. Only magnets in this case are glued at an angle to avoid sticking.
The new winding is rewound along the coil onto the stator tooth. You can make a bulk winding, it's convenient for anyone. The greater the number of turns, the more efficient the generator will be. Coils are wound in one direction according to a three-phase scheme.
The finished generator is worth trying out and measuring the data. If at 300 rpm the generator produces about 30 volts, this is a good result.
 Wind turbine generator from a car generator
 final assembly
The generator frame is welded from a profile pipe. The tail is made of galvanized sheet. The rotary axis is a tube with two bearings. The generator is attached to the mast in such a way that the distance from the blade to the mast is at least 25 cm. For safety reasons, a calm day should be chosen for the final assembly and installation of the mast. The blades under the influence of a strong wind can bend and break on the mast.
To use batteries to power equipment that runs on 220 V, you will need to install a voltage conversion inverter. The battery capacity is selected individually for the wind generator. This indicator depends on the wind speed in the area, the power of the connected equipment and the frequency of its use.
 Wind generator device
 To prevent the battery from failing from overcharging, you will need a voltage controller. You can make it yourself if you have sufficient knowledge in electronics, or buy ready-made. There are many controllers for alternative energy mechanisms on the market.
Advice. To prevent the blade from breaking in strong winds, a simple device is installed - a protective weather vane.
Wind turbine maintenance
A wind generator, like any other device, needs technical control and maintenance. For the smooth operation of the windmill, the following work is periodically carried out.
 Scheme of the wind generator
 - The current collector requires the most attention. Generator brushes need cleaning, lubrication and preventive adjustment every two months.
- At the first sign of a blade malfunction (trembling and imbalance of the wheel), the wind generator is lowered to the ground and repaired.
- Once every three years, metal parts are coated with anti-corrosion paint.
- Regularly check the fastenings and tension of the cables.
Now that the installation is complete, you can connect appliances and use electricity. At least as long as it's windy.
DIY windmill generator: video