A columnar strip foundation is one of the foundations suitable for the construction of frame houses, panel houses, panel houses, and log houses. In cases where the construction of a building is carried out on sandy soil, which is characterized by a low level of groundwater (more than one meter), it is possible to construct brick buildings on such a foundation. The ability to make a columnar strip foundation with your own hands allows you to avoid hiring a construction team and renting heavy equipment.
Calculation of depth
The beginning of work is associated with the selection of the most suitable material for the given area, which will be used in the construction of support pillars, and the depth of the foundation. For this purpose, geological survey work is carried out, during which it is established what specific features the soil in a given area has.
After receiving the geologists' conclusion, you can begin to perform calculations and draw up a project. It is best to entrust this to an experienced designer, even if all other work is done by hand.
 The quality of the soil directly affects the depth of the foundation
 Calculation of the depth of the future columnar strip foundation is carried out based on the following indicators:
- soil quality;
- the depth of its freezing;
- groundwater level.
If the groundwater level is significantly below the freezing point, then the foundation is not threatened by soil heaving, but in order to avoid structural destruction when water is close, the supporting structure must be located below the freezing level.
The calculation is carried out in accordance with existing building codes. This means that the minimum foundation depth is 10 centimeters, and the maximum depends on the above indicators. As for calculating the upcoming load, attention is paid to both the weight of the walls and the quality of the materials used to construct the roof.
So, for example, roof calculations are performed taking into account weight:
- lumber;
- roofing material;
- loads assumed by a roof of a certain size;
- total weight of the structure.
Calculation of the total weight of the future building box includes weight data:
- the bricks or blocks used, made from gas or foam concrete, necessary for the construction of walls;
- materials used for the construction of partitions inside the building;
- floor slabs;
- solution;
- communication systems;
- furniture designs.
 This base combines the advantages of strip and column bases
 Calculation of the total load of the structure includes data on the weight of the strip base itself, which exerts a certain pressure on the support pillars.
A column-and-strip foundation is created depending on the surveys and calculations carried out, both in the form of a reinforced concrete prefabricated grillage structure and in the form of a monolithic strip.
Considering the need for a basement floor, it is worth calculating its weight and the upcoming load. Having carried out all the above calculations, we can say with confidence what load the building will exert on the ground, and calculate the width of the supporting part of the strip foundation.
Preparation and start of work
Having received all the necessary data, you can begin clearing the territory and preparing the site for construction. In the selected location, the fertile and clay layer of soil is removed from the soil, replacing the clay with a layer of sand if necessary. Its thickness should not be less than 20 centimeters. In order to build a columnar strip foundation with your own hands, you will need to accurately and correctly mark the site.
When marking, strictly ensure that the right angle is observed at the intersection of the lines of the future foundation. It is at the intersection points that support pillars are constructed and installed, and failure to maintain an angle of 90 0 leads to distortion, deformation and destruction of the entire structure.
 The recessed base is the most reliable and is mounted below ground level
 Before you begin constructing the supports, you will need to determine the type of columnar foundation depending on its depth. He can be:
- buried, that is, located below the established freezing point;
- shallow - installed 70 centimeters below soil level;
- not buried. This design does not have an underground part.
The height of the support pillars is influenced by the construction technology and which grillage design is chosen for this structure.
Do-it-yourself construction of a base from pillars with a grillage involves the use of the most available materials. This means that in most cases, builders dig pits and pour reinforced concrete pillars as supports, performing high-quality reinforcement.
A distinctive feature of such a base is the presence of a sole under each pillar. If the dimensions of the pillar itself are no less than 40x40 centimeters, then for a reliable sole it is necessary to prepare an area of at least 1x1 meter. Such a sole does not require reinforcement, unlike support pillars. You will have to dig trenches with your own hands, without the use of construction equipment, keeping their width corresponding to the width of the sole.
In accordance with the technology for constructing pillars, the following is used:
- Reinforced concrete structure reinforced with rods with a diameter of 12-14 millimeters;
- asbestos pipe with internal reinforcement;
- brick;
- concrete blocks.
Wooden supports are practically not used. The technology is such that in the process of creating pillars it is necessary to perform high-quality reinforcement.
For this purpose, before pouring concrete, a reinforced frame resting on the base is installed in pipes or pits. The rods are fastened using binding wire, avoiding the use of welding. This will protect the frame from corrosion.
Pillars
 The pillars can be either cast-in-place supports or prefabricated shell pipes.
 Pillars are the vertical supports of the columnar strip foundation being constructed. They are located in the corners of the building, and if necessary (if the area of the house is quite large), their number increases significantly.
You can make such supports with your own hands by using ready-made pipes, building them out of brick, or pouring prepared pits with a reinforced concrete frame. A column-and-strip foundation refers to foundations that require widening at the bottom of the supports to strengthen them.
In cases where a finished pipe will serve as a support, you need to drill a well at the marking point to the depth indicated in the calculations. If a shallow columnar foundation is being constructed, then before you start drilling wells you will need to dig a trench for the grillage.
When installing pipes, you should use a level to check their verticality. There should be no deviations, otherwise the support will not be reliable.
The technology for performing the work does not require the creation of a cushion under such a support. When pouring concrete after the first portion, the pipe is raised so that the solution flows out of it. The blurred part will play the role of a pillow.
If you decide to make the pillars with your own hands, then first of all they build a pillow at the bottom of the pit. For such a widening, at the bottom of the pit, they construct a formwork of four fastened boards with their own hands, lay out waterproofing material and fill it with concrete. After the mixture has hardened, formwork is installed directly for the pillars. Boards with a thickness of at least 4-5 centimeters are installed vertically, fastened and sheathed with waterproofing.
A reinforced frame, assembled separately, is installed on the finished cushion in the middle of the assembled vertical formwork. It consists of vertical rods connected and reinforced with transverse jumpers. You need to make sure there are spacers that will help keep the frame strictly vertical. After which you can start pouring concrete. Concrete is not poured into such structures, but rather laid. This means that the mixture should not be liquid.
The consistency of the DIY solution resembles rather thick sour cream. Filling is carried out gradually, laying layers of mortar no more than 20 centimeters thick. Each layer is compacted using a vibrating tool or bayonet, getting rid of air.
To increase the strength of the structure, it is better to make the post head built directly into the grillage. Accordingly, the height of the pillar must be 10 centimeters higher than the design level so that the grillage formwork is made in strict accordance with the design.
Grillage formwork
When assembling the formwork for the grillage strip with your own hands, you need to take care of the presence of reliable supporting elements and high-quality fastening of the panels. Special attention should be paid to waterproofing. To do this, use impregnating compounds, roll materials, paint or a special coating mixture. The combined method is recognized as the most effective.
A reinforced frame is installed inside the assembled formwork, which is attached to the pillars protruding from the surface of the hardened concrete using binding wire. Reliable reinforcement allows you to increase the spatial rigidity of the entire structure several times. After completion of the work, they begin pouring.
Watch the video on how to properly fill the foundation of your future home with concrete.
Even when doing all the work yourself, you need to fill the grillage in one go. They also make concrete with their own hands using crushed stone of fraction 10/20, cement grade M 500 and sand in a ratio of 5:3:1.
Concrete gains full strength after 28 days. During this time, the concrete needs to be maintained. In wet weather, the surface is covered with plastic film, and in hot weather - with sand or wet sawdust. The formwork can be removed two weeks after completion of the pouring.
The choice of foundation type is determined, first of all, by the characteristics of the soil. Where, due to its instability, it is not possible to use a classic strip base, they often resort to combined systems. This option is a columnar strip foundation.
Peculiarities
A columnar-strip foundation combines the leading features of two types of foundations - columnar and strip. This combined option allows the construction of fairly heavy objects on unstable soils.
The supporting elements in this system are piles, which are dug into the ground below the freezing level of the ground and rest on hard layers of soil, bypassing soft ones. The strip concrete base takes on the load of the object, distributing it evenly between the piles. The tape binds the pillars without exerting pressure on the ground.


These types of foundations are suitable for unstable soils prone to heaving. First of all, these are clayey and fine sandy soils, organic soils (swampy, peaty), previously drained and drained. In addition, the use of piles allows construction to be carried out in areas with differences in height. In other words, the use of a pile-strip foundation makes it possible to make almost any site suitable for construction.
A strip foundation with pillars is similar in its principle of organization to its counterpart on piles, however, installing supports does not require the use of special equipment or drilling deep wells. This allows you to do the installation yourself and reduce the size of the estimate.
The advantage of columnar foundations is the ability to build on “problematic” soils, as well as in areas with differences in height. However, the design of such a system requires accurate calculations.
If you do not have the skills to do such work, it is better to entrust the matter to professionals.


Making a strip foundation on pillars does not require a large amount of excavation work and is cheaper than pile analogues. A gap must be maintained between the columnar-strip base and the monolithic screed to minimize the impact of soil heaving on the foundation.
Creating a foundation based on pillars is not suitable for moisture-saturated soils (areas located in lowlands or near water bodies, soils with groundwater). For such areas, it is better to choose a pile foundation with a strip base.
From the very beginning, you should decide on the features of the building - its size, number of floors, technologies used. The material used to make the pillars, their number and diameter depend on this.


Typically, pillar foundations in combination with tape are used on unstable soils and are intended for small one-story houses with an attic or two-story buildings made of lightweight materials. Suitable wall materials are foam blocks and wooden structures (log houses), as well as “frameworks”, for the construction of which Canadian and Finnish technologies are used.
Houses made of aerated concrete can also use a shallow foundation. But brick analogs require deepening the pillars and increasing the strength and diameter of the pillars.
Materials
Support pillars can be made from several types of materials.


Wood
This is an affordable and easy-to-install material, which, however, has the lowest load-bearing capacity and short service life. This option can be used as a foundation for small terraces, temporary buildings, and country houses.
The optimal diameter for wooden posts is 120-200 mm. Before use, the supports should be dried and coated with moisture-repellent and antiseptic impregnations. This will increase the service life of the pillars. Bitumen mastics are used as a waterproofing material.


Brick
Brick pillars have become widespread. Shallow columnar bases of square section with a side width of 40-50 cm are laid out of them.


Concrete
Concrete elements are monolithic or collapsible foundations based on concrete, reinforced with steel rods. The standard cross-section in this case is 400 mm. This option is suitable as a basis for capital construction.


Pipes
Tubular elements are metal pipes installed in the ground and filled with concrete from the inside. Rebar is used as reinforcement.


Calculations
The number of piles and their length are determined according to the calculation documentation. For areas with fairly stable soil, supports with a length of 2500 mm are sufficient. When constructing an object on uneven terrain, the height of the support takes into account differences in soil height. When building on highly mobile soils, the height of the support should be such that it reaches the hard layers of the soil plus 15-20 cm.
You can calculate the number of pillars by adding up all the loads on the foundation. To do this, you should calculate the load (weight) of 1 m3 of wall material and multiply this figure by the number of cubes of the entire room. This coefficient is summed up with the weight of the floor, ceilings, windows and doors, roofing, as well as internal equipment (furniture, finishing materials, equipment, communications).
It is worth considering that it is necessary to mount the pillars in the corners and points of intersection of the partitions.


The distance between the pillars is maintained within 100-250 cm. The heavier the object, the smaller the distance between the supports. It is not recommended to increase the pitch by more than 250 cm, since in this case the strength of the finished building will be reduced.
For wooden buildings, it is recommended to install pillars with a pitch of 3 m, in buildings made of foam and aerated concrete - 2 m. For brick houses, this figure is 1.5-1.7 m. In other words, the foundation for a house made of foam blocks measures 9x8 m on average requires at least 16 pillars, and a wooden analogue of the same size requires 12-14 pillars.

Installation stages
In general, the construction of a columnar strip foundation is divided into 2 large stages: creating a system of pillars and pouring a shallow strip foundation.
Creating a Project
The construction of any type of foundation begins with the creation of design documentation. This work is preceded by geological surveys (observation and analysis of the soil to find the optimal type of foundation). The project contains information about the bearing capacity of the pillars, their size, and number.
The type of foundation under consideration can be shallow or recessed. In the first case, the pillars are immersed in the ground 40 cm, in the second - 50-70 cm below the soil freezing level. The choice of a specific technology depends on the type of soil, the presence or absence of groundwater, and the characteristics of the facility under construction.


The step-by-step instructions for installing poles are not too complicated.
Site preparation
At this stage, debris is removed from the site, the top layer is removed and the site is leveled. On clay soils, the top layer is removed and a layer of sand is poured in, which is compacted and leveled.


Site marking
To do this, use pegs and a skein of visible rope or thread. The threads should be tensioned at a distance that corresponds to the width of the future foundation strip. It is important to monitor the intersection of threads in the corners; it must be strictly perpendicular. Marking is carried out at the points of passage and intersection of internal partitions, in corners, as well as in areas subject to maximum loads.


Creating trenches and recesses for pillars
At the location of the strip foundation, a trench should be dug about 400 mm deep. The width of the trench should be 70-100 mm greater than the depth.
In places of high loads (according to the design documentation), recesses are made into which the support pillars will then be lowered. Their diameter is calculated based on the load on the foundation. The higher it is, the larger the diameter of the pillars. A drill is used to create a recess. If the recess is long enough, then it is first made with a drill, then with an auger.
When laying pillars to a depth of more than 100 cm, it is necessary to construct supports from strong boards that will prevent the soil from crumbling. If the foundation depth is less than 100 cm, you can refuse to use supports.
Sand 10 cm thick is poured into the bottom of each recess. With a greater depth of laying the base, the thickness of the sand “cushion” reaches 30-40 cm.


Installation of supports
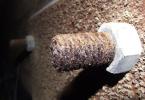
At this stage, the pillars are lowered into the prepared recesses. Most often, pipes that are filled with concrete are used. The pipes are first waterproofed, for example, by gluing them with a double layer of roofing material. After this, the pipes are lowered into the recesses all the way, after which their vertical orientation is checked.
The next step is pipe reinforcement. For this, a frame made of reinforcing rods with a diameter of 12-14 mm and knitting wire is used. The resulting frame should protrude 12-20 cm from the pipe.
After this, a concrete solution is prepared, which is first poured into the free space between the walls of the recess and the pipes. The filling height is about 20 cm. Then the cavity inside the pipes is filled.

Building a columnar foundation with your own hands is not difficult. The main thing is the difference between a regular tape and a supporting structure based on pillars. In the first case, a strip foundation is erected directly on the ground, and in the second, pillars are mounted and a grillage is installed on top.
The type of columnar foundation is selected depending on the type of soil.
They are divided into two types:
- prefabricated;
- monolithic.
Prefabricated columnar foundations are erected in areas where there is groundwater or the soil is very frozen. This type can be made faster than a monolithic one. But if you compare it in terms of strength, the latter is undoubtedly better.
A columnar foundation is also good for areas with large surface slopes
Depending on the degree of penetration into the ground, they can be:
- recessed;
- shallow;
- not buried.
Their construction differs somewhat in technology. In this article we will talk about how to make a non-buried strip-and-column foundation with your own hands.
Calculation and marking of column-strip foundation
One of the main points that you should pay attention to when erecting wooden buildings is preparation of the territory and correct marking. After all, the future strength of the entire structure depends on this.
The calculation and marking of the column-tape base can be done independently, with a minimum of tools. Before carrying out any work the site for construction should be carefully prepared. The best option in this case is when the soil is dry and homogeneous. Experts recommend additionally finding out how much the soil in this area can freeze to prevent the walls from collapsing.
 The foundation is usually laid 20 cm below the freezing depth. We will allow a slight slope of the construction site in any direction except north. This is provided for the drainage of rain and melt water.
Required materials and tools
ForMarking a columnar foundation with a grillage cannot be done without the following set of tools and materials:
- construction tape;
- linen cord;
- building level;
- wooden pegs, the length of which is 50 cm;
- right triangles.
Scheme for calculating a column-strip foundation
Marking starts from the inside, this is where the first corner of the future structure is set and the peg is driven in. Next, use a triangle to measure the dimensions of the outer part of the foundation.
It is necessary to mark the area with an accuracy of several centimeters in the difference in diagonals
On one side, the length will be equal to the size of the longitudinal side of the wall, and on the other, the transverse side. Two more wooden pegs are driven in at the intersection of the axes. The remaining corners of the future structure are measured in the same way.
The next stage is performing cast-offs.
It is as follows:
- secure the boards to special poles installed next to the driven pegs. They are fixed at the height of the future floor of the building, no higher than 1.5 cm from the soil itself;
- check that the labels are set correctly;
- When building a columnar type with your own hands, it is important to pay attention to the axial dimensions. They are applied along the top of the cast-offs, and then nails are driven in and a clothesline or cord is pulled on all sides.
Calculation of a columnar foundation with a grillage
If you need to build a columnar foundation with a grillage with your own hands, first of all you should calculate how many supports you will need to make in order for it to be used for a long time.
As in the previous case, work begins with geological surveys, in order to determine the bearing capacity of the soil. This indicator can help calculate the area of support, information about which can be easily found on the Internet or specialized literature.
 Then you need to calculate the weight of the entire building. It depends on the weight of the materials used plus wind and snow loads. The resulting number must be divided by the weight that 1 cm2 of soil can support. This will be an indicator of the area of the foundation. For the final result it is necessary to add 30% to the resulting figure as a safety margin.
In order to calculate the required number of pillars for a columnar base with a grillage, the supporting area is divided by the area of the base of the support.
This type of foundation is extremely popular precisely because of its simplicity, strength and the ability to do all the work with your own hands in the shortest possible time, even without much construction experience. And by comparing the prices of the material, we can calculate that it will cost 1.5-2 times cheaper than any other type.
But it also has a drawback that must be taken into account at the design stage. It is highly not recommended to build it on moving soil, as well as in areas where groundwater flows or large differences in height are observed.
How to make a columnar foundation with your own hands
At its core, a foundation is a system of supports located:
- at the corners of the building;
- at the intersection point of the walls;
- under supporting structures.
If a stone oven is planned on the ground floor, then it is also better to lay support piles under it
Before performing any work be sure to draw up a detailed future design and then try to adhere to it exactly, taking into account all the documentation for the project. Then the building is guaranteed to be able to stand for a long time.
The possible load on the foundation is also of great importance when choosing a support.
So, you need to take into account the following parameters:
- approximate weight of future construction, furniture;
- number of residents;
- the weight of the base and the entire building;
- snow load.
This determines which material is best to choose and how much of it is required. It needs to be filled before winter arrives., because left for this period, it will become deformed and you will have to start all over again.
To build a columnar foundation with your own hands, you need to stock up on the following tools and materials:
- reinforced concrete, concrete or brick supports;
- fittings;
- formwork board;
- sand;
- crushed stone;
- cement.

For formwork, it is better to take a board whose thickness is 20 mm. You can, of course, purchase special metal plates or particle boards for these purposes, but the cost of wood is much lower.
- assemble boards from boards and boxes from them;
- insert them into a previously prepared depression in the soil in the places where the supports are located;
- completely moisten the inside of the box with water. This will prevent water from being absorbed from the concrete and may make it easier to remove the box after the concrete mixture has dried.
Then it is necessary to reinforce the foundation using reinforcement with a diameter of 12-16 mm. It is better to place it inside the box so that the edge of the reinforcement does not reach the walls of the box by 5 mm. For a longitudinal arrangement, rods with a diameter of 6 mm are used, welded after 30-40 cm. After the grillage frame is completed, the excess rods are simply removed.
The last step is to insulate the columnar foundation and waterproof it. These works increase the service life of the foundation. But this is not typical for all types of foundations. For example, a screw foundation does not require waterproofing and insulation work.
Cost of erecting a columnar foundation
The cost of the finished product depends on many indicators:
- the area where the future building will be located;
- on soil type;
- on the width of the base and its depth;
- on the materials used for the construction of a columnar foundation (their quality, size, manufacturer and type).
When hiring specialists, in addition to these parameters, the volume of work and the number of workdays are taken into account. It should be noted that the price for building a monolithic strip foundation is slightly higher compared to other options.
Prices for the construction of a columnar foundation per 1 linear meter, taking into account different types of concrete, are shown in the table:
| Foundation size | Concrete grade, (diameter of reinforcement, mm) | Price per 1 linear meter
(rub) |
| 300 x 500 | M-200, (V-7.5) | 4200 |
| 300 x 500 | M-300, (V-22.5) | 4100 |
| 300 x 800 | M-200, (V-7.5) | 6750 |
| 300 x 800 | M-300, (V-22.5) | 6850 |
| 300 x 1000 | M-200, (V-7.5) | 8400 |
| 300 x 1000 | M-300, (V-22.5) | 8500 |
| 300 x 1200 | M-200, (V-7.5) | 10100 |
| 300 x 1200 | M-300, (V-22.5) | 10200 |
The cost of the foundation itself is relatively insignificant, which will reduce the overall costs of building a wooden house or bathhouse on a summer cottage.
More information about the stages of constructing a columnar strip foundation with your own hands can be seen in the video:
The foundation is the foundation of the entire building, so it is very important that it is strong and durable. A strip-and-column foundation is a monolithic type of foundation, which is ideal for erecting it on heaving, swampy or sandy soil. This type of structure is suitable for private houses with wooden or timber-frame walls. It is quite durable and does not require significant costs. This article will talk about how to make a strip-column foundation with your own hands, without using special equipment and without hiring highly qualified workers.
This type of foundation consists of two main components - supporting structures and grillage. The supporting structures are pillars, and the grillage is a system in the form of a tape.

The tape element allows you to cover the subfloor of the building with a reliable structure that can withstand excess moisture. In addition, the grillage tape creates a surface that is very convenient to use for laying wall materials such as foam blocks and bricks.
Advantages of a column-strip foundation
The advantage of this type of foundation is the presence of vibration protection. The structural support is equipped with side sections that are tightly fastened to the tape element, which creates a “vibration isolating system.” The main purpose of this system is to reduce the effects of vibration generated by roads or railways located next to the building.
The main positive quality of this type of foundation is its low labor intensity. Even non-professionals can manipulate the preparation of a site for construction and pouring the structure with concrete, so it’s quite easy to make a columnar strip foundation with your own hands. The strip element of the foundation structure is placed above the ground, so the amount of concrete mixture used is reduced, which allows for significant savings on the construction budget.
In addition, another advantage of this design is low heat loss. This quality is explained by the fact that the main part of the structure will not have contact with frozen soil, which will reduce heat loss by approximately half.
Components of a columnar strip foundation:
- The supporting structure is pillars. The number of pillars depends on the weight of the building.
- Reinforcing frame.
- Tape design.
- Internal piles.
Types of pillars for columnar-strip foundations
Precast pillars are produced directly at the construction site and installed in special wells into which concrete mortar is poured. Bored posts are especially popular. This can be explained by the fact that this design does not require special costs and has good load-bearing capacity. This type of structure can be concreted without casing.
In some cases, single support structures are used. Such poles are suitable for places that will bear the main load.
Choosing the right material for constructing the pillars of the structure
When constructing a strip-column foundation, you first need to pay attention to what materials will be used in the construction of the supports. For this purpose, you can use brick, concrete blocks, metal or asbestos cement pipes, as well as wood.
Peculiarities: 
- Wooden supports. This type of pole is not particularly popular due to the fact that wood is a short-lived material. But still, wooden supports are used to build wooden terraces. The pillars for this purpose should have a diameter of 0.15 -0.2 m. In addition, it is better to treat the wood with impregnations that will prevent destruction.
- Pillars made of pipes made of asbestos concrete or metal. Monolithic columnar-strip foundations are quite often made from these elements, since such pipes are well suited for permanent formwork.
- Brick pillars. Supports made of this material are used if the columnar foundation is to be made unburdened. The width of the brick structures should be half a meter.
- Concrete pillars. This type of support is considered the most reliable, which is why they are most often used in the independent construction of a columnar strip foundation. There are monolithic concrete pillars and those made from ready-made blocks. The width of this structure should not be less than half a meter.
The process of constructing a columnar strip foundation
This process consists of two main stages:
- Creating a support structure from pillars.
The first step is to choose the right foundation depth. This must be done taking into account the structure of the soil, the degree of freezing of the ground and the depth of groundwater. As the foundation sinks, it is divided into two types: shallow and buried. The buried columnar-strip foundation is immersed approximately half a meter below the freezing level of the soil.
You need to pay attention to the fact that the pillars need to be installed at a distance of one to two meters from each other. A larger distance may result in a structure that is not very strong.
The installation of foundation supports must begin with the preparatory stage, which consists of preparing the site for construction. First of all, remove the excess layer of soil, making the area level. If the soil at the construction site is clayey, then you need to remove most of it and fill the area with sand.
Then we mark out our construction site. To do this, you need to use a special thread used in construction. Let's stretch it in the form of two non-intersecting strips, the distance between which is equal to the thickness of our strip foundation.
Do not forget to monitor the angle of intersection of the threads, it should be equal to 90⁰. Also, we must not forget to mark the intersections of wall surfaces and the corners of the building.
The next step is to dig trenches in the places where the strip structure of our foundation lies. The depth of the trenches should be approximately 40 cm, and the width should be made in such a way that there is still about 10 cm left for placing the formwork.

To install the pillars we use a concrete mixture, but do not forget about creating a waterproofing layer. For it, using roofing felt rolled into a couple of layers, we make a pipe. We connect it with tape and insert this structure into the ground until it stops.
Before making a columnar strip foundation, you need to take care of creating a frame from reinforcement and wire, and then insert it into the drilled hole so that the reinforcement protrudes outward by approximately 15-20 cm.
Next, we will begin pouring the resulting support with concrete. To begin, we will pour a layer of concrete mixture about 20 cm thick into the well. Then we will lift the roofing felt pipe to allow the mixture to form a base. The next step is to fill the well completely and leave the concrete to dry.
- Creation of the strip part of the foundation.
First of all, we knit the reinforcing frame again. Then we weld it and attach it to the reinforcement protruding from the concrete-filled pillars.
Having completed all the above-described stages of constructing a columnar-strip foundation, we will begin installing the formwork, which is part of the strip foundation. To do this, take several boards, the width of which is 10 cm, and assemble formwork from them. Then lay waterproofing inside the formwork, which can be polyethylene film.
After carrying out these manipulations, we will fill the formwork with concrete. You can do this manually, or you can use a special mixer machine. The formwork can be removed after three weeks, when the concrete becomes strong.
After the concrete has hardened, you need to apply a coating layer of waterproofing to the foundation. The side parts of the strip structure need to be processed. For this purpose, heated bitumen can be used. It is best to do this procedure a couple of times.
It is better to remove the sand poured under the strip element, since otherwise the building will stand on a non-buried structure. The result should be a trench about two centimeters deep. After pouring the concrete, the mixture that falls into this trench will create a protrusion that will help securely fix the structure.
Among all the types of concrete foundations used today, the columnar strip foundation deserves special attention. Most often, this design is used when arranging heavy and massive construction projects.

Provided that it is constructed correctly, the column-and-tape structure will have the highest performance indicators. At the same time, relatively little time and money are spent on arranging such a foundation, and all the required work can be done on your own.

Familiarize yourself with general information about column-and-strip foundations, study the manual for arranging such structures and get to work.
General information about columnar-ribbon type bases
The use of such a design will be justified when performing construction work in areas with a large depth of soil freezing.
In such situations, the construction of an ordinary buried strip foundation will require irrational financial investments, and a shallow structure simply will not cope with the tasks assigned to it.
In such conditions, a column-and-strip foundation is an excellent option. Even a beginner can cope with the arrangement of such a structure.

An additional advantage of the foundation in question is the possibility of its arrangement on sloping areas. But if the underground aquifer is located too close to the ground surface, it is recommended to refrain from such a decision.
In the design under consideration, the largest part of the load falls on the base of pillars. In this case, the pillars must be placed in the ground at least 200 mm below the freezing point of the soil. Thanks to this, maximum durability and reliability of the structure will be ensured.

To prevent the tape from rising in the future under the influence of natural changes in the structure of the soil, its lower part must be made somewhat wider.
In a columnar-tape type structure, the tape serves exclusively as an upper grillage, which is necessary to connect the pillars into a single structure and further increase the strength of the base. At the same time, the tape does not exert any load on the ground.

Using the tape, the most even distribution of the load on the main foundation pillars is ensured.
The foundation must be designed so that after complete completion of the structure, at least 150-200 mm of free space remains between the lower edge of the grillage and the top layer of soil. Thanks to the presence of such a gap, the foundation will not receive any significant damage even with severe swelling of the earth.
What are the pillars made of?
Before you begin to independently arrange a columnar-tape base, you must choose the optimal material for making supports. Available solutions include: wood, concrete blocks, brick, asbestos cement and metal pipes. Familiarize yourself with the features of each option and choose the most suitable solution for your situation.

They are used extremely rarely due to their relatively low durability. Wooden pillars are only suitable for arranging a foundation intended for installing a terrace or other similar structure.
The optimal diameter of wooden posts is 150-200 cm.
Before burying pillars of the material in question into the ground, they must be treated with antiseptic and fire-retardant impregnation. Thanks to this treatment, the resistance of the material to rot, pest damage and fire will be significantly increased.
Bitumen-based mastics are optimal for waterproofing wood.

Iron brick is well suited for arranging a columnar-band structure. With its use, shallow columnar foundations are also erected.

Supports in the form of concrete pillars, additionally strengthened with reinforcement, are considered the most reliable. Because of this, these types of supports are the most popular.

Concrete pillars can have either a solid (monolithic) structure or consist of several blocks.
It is important that the width of the pillars is at least 40 cm.

Pipes made of asbestos cement or metal are very easy to install. Installation boils down to placing hollow pipes in pre-prepared recesses, installing reinforcement rods inside the pipes and finishing filling the cavity with concrete mortar.
The work is done extremely quickly and simply. The optimal pipe diameter is selected individually, taking into account the expected load on the foundation being built.
Stages of foundation construction
The construction of the foundation of this type is carried out in two stages. First you will need to create the base of the structure from pillars, and then arrange a shallow concrete strip.
Pillars
Before starting work, determine the optimal depth of the columnar-tape base. At this stage, consider the following parameters:
- type and features of soil structure;
- ground freezing level;
- depth of groundwater passage.
There are shallow and recessed foundation structures. When arranging a shallow foundation, the pillars are usually immersed 40 cm into the ground, but in the case of constructing a buried foundation, the supports are deepened 10-50 cm below the freezing point of the soil.

Maintain the installation step of the supports within 100-250 cm in accordance with the future load. The higher the load on the base, the smaller the space between the installed supports should be. Professional builders strongly do not recommend placing supports at intervals of more than 250 cm, because this will lead to a significant reduction in the strength of the finished structure.
Proceed to install the support posts. This is a fairly simple job done in a few steps.
First step. Prepare the area for upcoming events. To do this, remove the fertile ball of soil and level the area. If the top layer of soil on your site is clay, remove more of it and fill the resulting base with a small layer of sand.

Second step. Mark the area. Any suitable pegs and visible rope will do for this. Pull the thread at a distance corresponding to the width of the future concrete strip.
Watch the angle at which the cords intersect. It is important that the threads intersect strictly perpendicularly.
Mark the intersections and junctions of internal partitions and external walls of the building, the corners of the future structure and areas that will be subject to the most severe loads.


Third step. Dig a trench where the strip part of the foundation is installed. A hole about 400 mm deep will be enough. The width of the trench should be 70-100 mm greater than the width of the tape. This gap is necessary for the installation of formwork boards.

Fourth step. Make recesses in the places where the support pillars will be installed. A drill or other suitable device will help you with this. Select the diameter of the recesses individually in accordance with the expected loads on the foundation. The higher the load, the larger the diameter of the support pillars should be.

If, according to the project, the pillars will lie more than 100 cm, be sure to install supports made of strong boards. They will prevent the soil from crumbling. If the pits are up to 100 cm deep, you can refuse to install supports.
Fifth step. Fill the bottom of each hole with a 100mm layer of sifted sand.
Sixth step. Start arranging the pillars. In the example under consideration, the supports are made of asbestos-cement pipes.

Pre-waterproof the supports. To do this, cover them with a double layer of roofing felt or other similar material. Insert the pipe with waterproofing into the recess until it stops.
Tie a reinforcing frame from steel rods and knitting wire. Use rods with a diameter of 12-14 mm. The fittings must be such a length that its upper ends protrude from the pipes by 150-250 mm.

Start pouring. First you need to fill the free space in the holes around the supports with concrete to about 20 cm of the height of the recesses, and then pour the pipes directly.
Leave the finished posts to dry and gain strength.


Ribbon
Proceed to arranging the ribbon part of the structure.
First step. Tie the frame from reinforcing bars and steel tying wire. Weld the structure and screw it to the reinforcing bars protruding from the concrete support pillars.
Second step. Install the formwork to fill the tape. Assemble the formwork from boards 40 mm thick and about 150 mm wide. Boards can be replaced with chipboards, plywood or sheet metal.

Third step. Cover the inner surface of the formwork with moisture-proofing material. Polyethylene is suitable for waterproofing; more modern membrane materials can also be used.
Fourth step. Fill the formwork with concrete mortar. To save time and effort, you can order ready-made concrete. If desired, you can prepare the solution yourself. Perform the filling in one go. Pour the solution horizontally. Vertical joints are strictly prohibited - they will crack even before the concrete has completely hardened.

Treat the poured concrete with a special vibrator. This treatment will eliminate voids and excess air. If you don't have a vibrator, at least pierce the concrete with rebar in several places, and then carefully seal the holes with concrete.
The filling will dry within a month. It is recommended to dismantle the formwork only after the filling has completely hardened. For some time (usually 1-1.5 weeks), the poured concrete must be additionally moistened, otherwise it will crack.
Determine the frequency and duration of moistening individually in accordance with the “behavior” of concrete and weather conditions.

Waterproof the hardened and strengthened concrete, fill the remaining trenches with earth and proceed with the planned construction activities.
Good luck!
Video - Do-it-yourself columnar-strip foundation